Monday, September 5, 2011

Crock Pot Bajio Green Chile Chicken Salad

This is a favorite salad of mine... The Green Chile Chicken Salad from Bajio. My mouth starts drooling just as I think of it. The sweet and salty and spicy collection of flavors in this crispy salad. It is sooo yummy! I made a very extensive version of this salad about two years ago and now I have a quicker and simpler way to make this salad, with almost the same results.

The salad begins with a bed of lettuce leaves, some shredded cheese, the chicken (the most important part of the salad), some chopped tomatoes (instead of fresh pico de gallo), some corn tortilla crunchies, and then finally the cilantro lime dressing (the second most important part of the salad) with a warmed flour tortilla on the side.

In order to make this salad... you must make the chicken and the dressing. The rest is superfluous. You can add black beans or rice or any other things that you might like in tacos or salads. But like I said before... you MUST make the chicken and the dressing. So let's get on with the chicken....

Here it is in the crock pot.... ready to serve up...

Here's the recipe...


{{Bajio Crock Pot Green Chile Chicken}}


(printer friendly recipe click here)


5 frozen chicken breasts

1/2 cup salsa, medium (I used Herdez salsa)

1 Tablespoon cumin

1/2 cup brown sugar (or more to taste)

1 4-ounce can of diced green chiles (HOT)

1 medium yellow onion, sliced thinly

6-10 ounces of Sprite (almost a full can)

2 Tablespoons cornstarch

2 Tablespoons cold water (never use warm or hot water)


Combine all ingredients in a crock pot except for the cornstarch and cold water. Cook chicken on low for 5-6 hours. Remove chicken and shred. Mix together cornstarch with the cold water and whisk into the juices left in the crock pot. Add shredded chicken back into the crock pot and cook for one more hour for the juice to thicken.


**If you want a more spicy chicken, rather than sweeter, add a hotter salsa and more green chiles.


To make the corn tortillas crunchies.... Pour some oil into a frying pan and heat up over medium heat. While the oil is heating up, cut the corn tortillas in half. Then cut each half into strips that are about 1/4 inch wide.

Test the oils readiness by putting one small strip into the oil. If it starts popping and frying the tortilla... then you know the oil is ready. Place a small amount of strips into the oil and cook them until they are crisp... it only takes a few minutes. They will quickly go from crisp to golden brown to overdone... so keep an eye on them. Using a slotted spoon, remove the strips from the oil and drain them on a paper towel. Sprinkle a small amount of fine sea salt over the warm strips and toss. Set aside to use on the salad.

Here's a helpful cooking tip: When grating cheese... spray the cheese grater with cooking spray to help the cheese come off easily. Nice!

Finally... the cilantro lime dressing... Mmmmmm... yummy-ness!{{Cilantro Lime Salad Dressing}}

(printer friendly version click here)


1 package Hidden Valley Ranch Dressing (dry mix)
1 cup buttermilk
1/2 bunch of cilantro, chopped
1 small jalapeno, remove seeds
1 cup mayo
1 teaspoon fresh lime juice
1-2 tomatillos, remove outer papery skin
1 garlic clove, peeled and cut up

Blend all ingredients together in a blender. Chill for a few hours to allow the flavors to blend together. Serve on your favorite salad.


{{Crock Pot Bajio Green Chile Chicken Salad}}


(printer friendly version click here for the recipes for the whole salad)


Chopped Lettuce
Crock Pot Green Chile Chicken
Shredded Cheese
Chopped Tomatoes
Corn Tortilla Crunchies
Black beans or Rice (optional)
Cilantro Lime Dressing
Warmed Flour Tortillas, on the side

Enjoy your salad.... cause I know that I do!

Sunday, September 4, 2011

Zucchini Carrot Bars


{{Zucchini Carrot Hearts with Lemon Cream Cheese Frosting}}

(printer friendly version)

2 eggs, slightly beaten
3/4 cup brown sugar, packed
1/2 cup canola oil
1/4 cup honey
1 teaspoon vanilla
1 1/2 cup shredded carrots
1 cup shredded zucchini, with peels on
1/2 cup chopped walnuts
1 1/2 cups whole wheat flour
1 1/2 teaspoon baking powder
1/2 teaspoon ground ginger
1/2 teaspoon cinnamon
1/4 teaspoon baking soda

{Lemon Cream Cheese Frosting}

1 (8 oz) pkg reduced fat cream cheese, softened
1 cup powdered sugar, sifted to remove lumps
1 1/2 tsp lemon zest

Preheat oven to 350 degrees F. In a large bowl, whisk together the eggs, brown sugar, oil, honey, and vanilla. (Cooking Tip: Measure the oil in a 1/4 measuring cup, then using the same cup measure the honey... it will just fall right out of the cup, nothing will stick to the inside of the cup). Set aside. Shred the carrots and zucchini (peels on add more color and texture, but you can take them off too!) and chop the walnuts. Then fold the carrot, zucchini, and walnuts in the egg and sugar mixture.

In a separate bowl combine the flour, baking powder, ginger, cinnamon, and baking soda. Whisk to blend together.

Mix the wet and dry ingredients together and stir just until combined. Spread batter into a parchment paper lined 13x9x2-inch baking pan.

Bake about 25 minutes or until a toothpick inserted in center comes out clean. Cool completely in pan on a wire rack.

Once the cake is cooled, pull the cake out of the pan by pulling up on the edges of the parchment paper. Using a cookie cutter, cut out the shapes and place on a wire rack over a cookie sheet.

Prepare the frosting. In a small microwave safe bowl, soften the cream cheese by heating on high for about 30 seconds. You don't want the cream cheese melted, but you want it really soft. In a medium sized mixing bowl, beat the cream cheese, sifted powdered sugar and lemon zest with an electric mixer on medium speed. Frosting will be soft. Put frosting into a piping bag with a small circle tip (or ziploc bag and snip a tiny hole in the corner) and pipe frosting over the cooled bars in a zig zag pattern.

**Simplified version.... Just cut the bars into squares and pipe (or spread) the frosting on them.


Store them in the refrigerator until ready to serve. Enjoy! Healthy and delicious! Perfect!

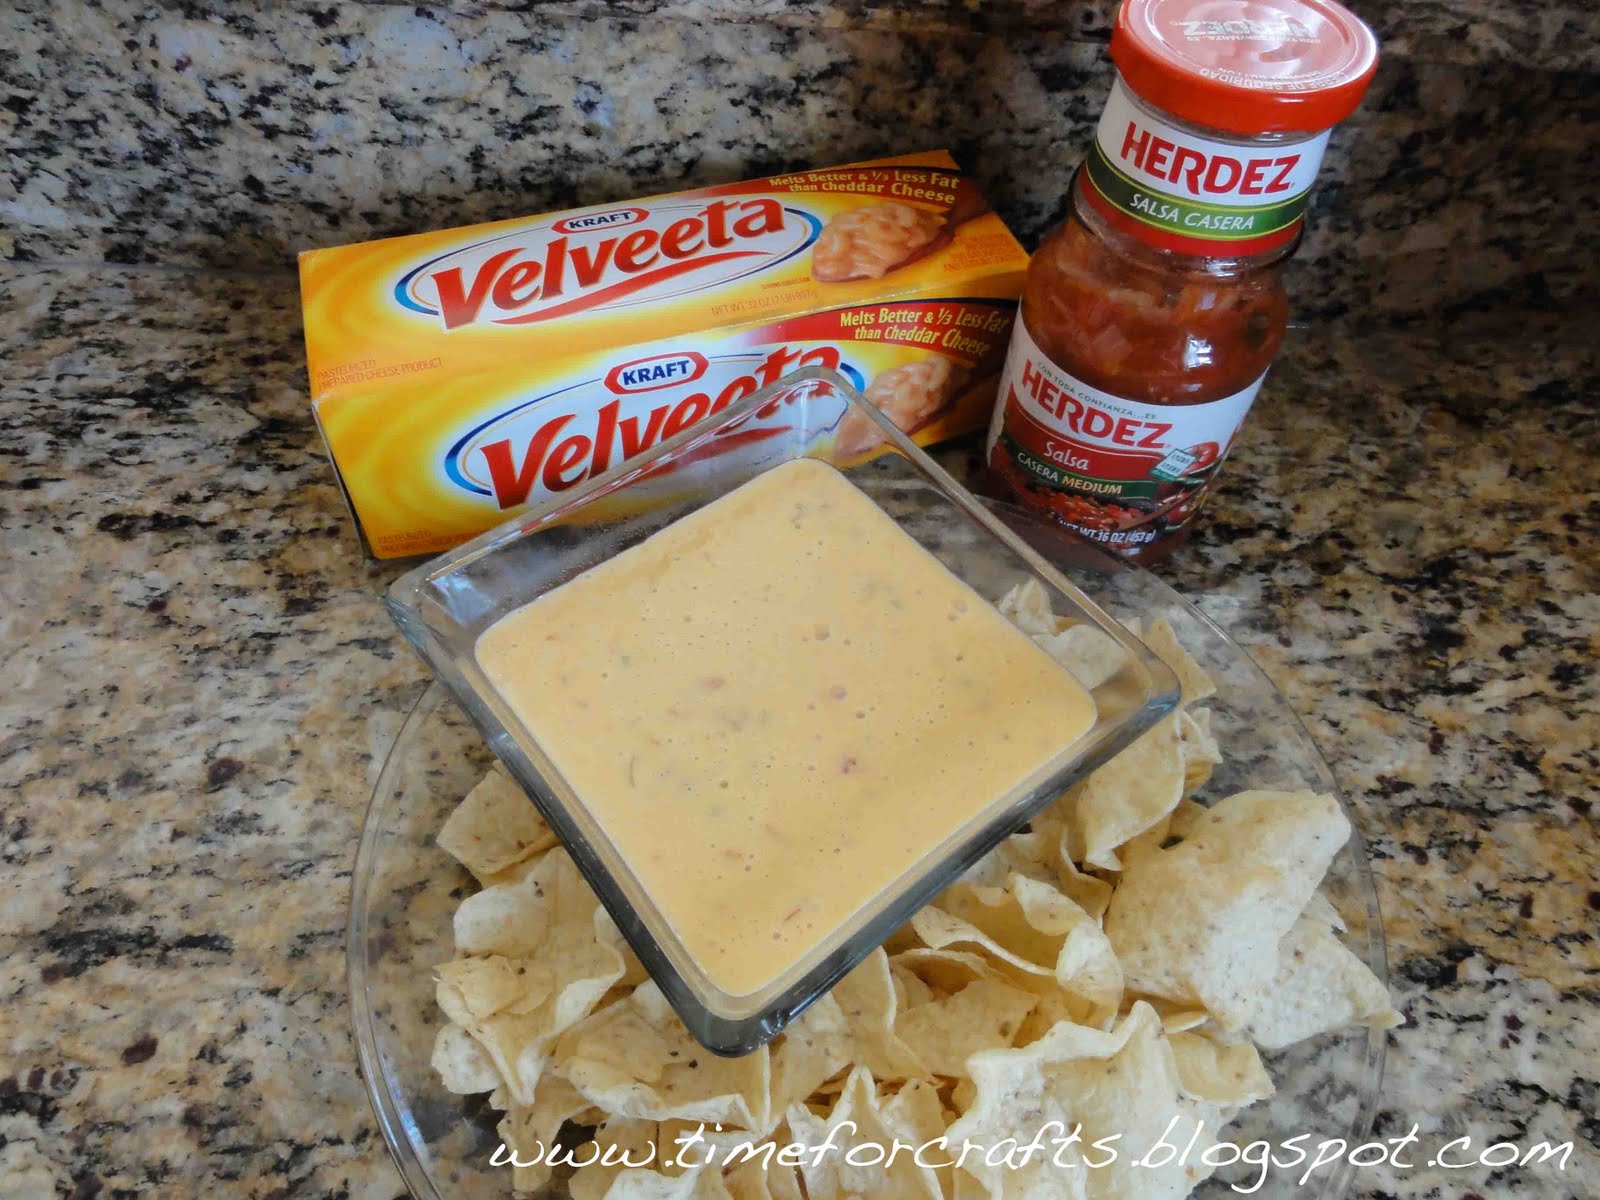
Nacho Cheese Dip


Yummy Nacho Cheese Dip!

Only requires 2 ingredients. Velveeta Cheese and your favorite salsa. This recipe is easy to vary to accommodate as much or as little dip as you need.

{{Nacho Cheese Dip}}

(printer friendly version)

8 oz. Velveeta cheese, cut into cubes
1/4-1/2 cup salsa, medium spiciness

Put ingredients into a microwaveable bowl and heat on high for 60 second intervals and stir until smooth. Will take about 2-3 minutes. Put into a serving dish and garnish with diced green onions, if desired. Allow to cool slightly before serving. Dip will be hot and slightly runny, depending on how much salsa you add and will thicken as it cools. Serve with tortilla chips.

Saturday, September 3, 2011

Samoa Cookie Bars


Mmmmm.... I love Girl Scout cookies... and the Samoa cookies are my favorite. Thin Mints run a close second. It is one of the best parts of the beginning of the year. When the little girls come around to sell their cookies... it is truly a delightful day. But those boxes only last so long, even if you store them in the freezer (which if you didn't know, Girl Scout Cookies store very nicely in the freezer so you can buy extra boxes to help the sweetness last more of the year).

While playing on the internet the other day... I was delighted to find this vinyl sign here... Isn't that awesome! I think it is a very creative NO SOLICITING sign. But I might have to get one that says SAMOAS instead of Thin Mints. Either one would work though.

Anyways.... back to the cookies. Sometimes you need a cookie and this was a great way to make your own cookies. This was the simplified version of the recipe. Instead of rolling out the dough and cutting out all cookies, I found this recipe that turned them into Samoa Cookie Bars. I wanted to make sure they tasted good before spending so much time rolling and cutting and dipping. These were well worth the time and I'm excited to try them in cookie form soon.

Start with the shortbread cookie dough. Mix it up in the mixer.

Then press the shortbread cookie dough into a parchment paper lined 9x13 inch pan.
Bake in a 350 degree oven for 20 to 25 minutes until the cookie base looks set and starts to turn a golden brown on the edges. Allow the cookie to cool completely on a wire rack.
Reduce the oven temperature to 300 degrees. While the cookie base is cooling, place your shredded coconut on a rimmed baking sheet and toast the coconut until golden brown. Will take about 20 minutes. You will want to stir the coconut every 5 minutes to keep it toasting consistently and evenly.

When the coconut looks golden brown, pull out the coconut out of the oven and set aside.
While the coconut is toasting, unwrap the caramels and place in a large heavy saucepan with the milk and salt. Melt the caramels on high for about 3-4 minutes. Stirring til smooth.

Then add the toasted coconut to the melted caramel and stir together.

Spread the coconut and caramel mixture over the cooled cookie base.

Let that cool and then cut into 30 bars.

While the bars are cooling, melt the chocolate in a double boiler.

Dip the bottom of the cookie bars into the chocolate and then drizzle the melted chocolate across the top of the bars. Once the chocolate has set, they are ready to serve. (I tested one before the chocolate was set because I just couldn't resist anymore.) I don't think these are difficult to make, there are just lots of steps and waiting time in between each step. But in my opinion... well worth the time spent! The only thing I will change next time is that I think the shortbread was too thick. I think next time I make these, I will spread out the cookie base a little bit thinner.


{{Homemade Samoas Bars}}

(printer friendly version)

Cookie Base:
1/2 cup sugar
3/4 cup butter, softened
1 large egg
1/2 tsp vanilla extract
2 cups all purpose flour
1/4 tsp salt

First, make the crust.
Preheat oven to 350F. Lightly grease a 9×13-inch baking pan, or line with parchment paper.
In a large bowl, cream together sugar and butter, until fluffy. Beat in egg and vanilla extract. Working at a low speed, gradually beat in flour and salt until mixture is crumbly, like wet sand. The dough does not need to come together. Pour crumbly dough into prepared pan and press into an even layer.
Bake for 20-25 minutes, until base is set and edges are lightly browned. Cool completely on a wire rack before topping.

Topping
3 cups shredded coconut (sweetened or unsweetened)
12-oz good-quality chewy caramels
1/4 tsp salt
3 tbsp milk
10 oz. dark or semisweet chocolate (chocolate chips are ok)

Preheat oven to 300. Spread coconut evenly on a parchment-lined baking sheet (preferably one with sides) and toast 20 minutes, stirring every 5 minutes, until coconut is golden. Cool on baking sheet, stirring occasionally. Set aside.

Unwrap the caramels and place in a large microwave-safe bowl with milk and salt. Cook on high for 3-4 minutes, stopping to stir a few times to help the caramel melt. When smooth, fold in toasted coconut with a spatula.
Put dollops of the topping all over the shortbread base. Using the spatula, spread topping into an even layer. Let topping set until cooled.
When cooled, cut into 30 bars with a large knife or a pizza cutter (it’s easy to get it through the topping).
Once bars are cut, melt chocolate in a small bowl. Heat on high in the microwave in 45 second intervals, stirring thoroughly to prevent scorching. Dip the base of each bar into the chocolate and place on a clean piece of parchment or wax paper. Transfer all remaining chocolate (or melt a bit of additional chocolate, if necessary) into a piping bag or a ziploc bag with the corner snipped off and drizzle bars with chocolate to finish.
Let chocolate set completely before storing in an airtight container.

Makes 30 bar cookies.

Note: You can simply drizzle chocolate on top of the bars before slicing them up if you’re looking for yet an easier way to finish these off. You won’t need quite as much chocolate as noted above, and you won’t quite get the Samoas look, but the results will still be tasty.

Friday, September 2, 2011

Felt Flowers For Headbands or Clips

These felt flowers are easy to make and quick. You can make them with as many petals as you want and you can vary the size of the flower based on the size of the petal. Obviously you can make them any color too.

Starting with at least 5 petals, cut them out of your color choice of felt. Using a piece of coordinating thread and a needle, thread them all together. Down on the first side and then up at the bottom of the petal, then down and up, etc. When all the petals are on the thread, you are ready to move to the next step.
Pull on the thread until the petal pull together and form a flower. Thread the needle back into the first petal so that it completes the circle.

Then complete the flower by tying a square knot in the thread and snipping it off. You can use a dab of hot glue to ensure that the thread doesn't come undone.
Next you can add a small rectangle of felt on the back so that it can be added to the headband temporarily. Click on the image to enlarge so that you can clearly see where the rectangle of felt is. Use hot glue on the edges of the rectangle and attach it to the flower.

Attach a jewel in the middle of the front of the flower to finish it off. Voila... Done! Ready to wear.Slip the rectangle onto a headband and place it where you want it. You can have it on top or on the side. This keeps your options open. Plus when you are done wearing the flower, you can remove it from the headband and it won't get squished. You can also put this flower on a clip.

Here it is on the my two daughters. Cute. Simple.

Wednesday, August 31, 2011

Pancake Art

We LOOOOOOVE pancakes at our house. They can be so simple to make too. Sometimes it is nice to dress them up a little bit differently. Here are some of the pancakes that we have been making lately.

Here is our sun/flower pancake. Boys don't mind eating a sun... but they aren't so keen on eating a flower. Fruit and pancake... perfect breakfast.

How about a teddy bear for breakfast.... one very large pancake for the head, one medium to small pancake for the nose/snout, and two small pancakes for the ears. Use two chocolate chips for those dark brown bear eyes and then chocolate syrup to draw on the mouth.

Best part here... It's the syrup and it looks like he is covered in honey! CUTE!

Here's a monkey pancake... Once again almost like the bear: one very large pancake for the head, one medium to small pancake for the nose/snout, and two small pancakes for the ears... It is just about how you put them together on the plate. Also for the monkey we mixed in about 1 Tablespoon of cocoa powder into the pancake batter to make the other parts darker. Add two regular chocolate chips for eyes, and then we used mini chocolate chips to make a mouth. Serve with a banana and breakfast is ready!

Another fun and easy pancake... Mickey Mouse! On the griddle or pan where you are making your pancakes.... start with a medium to large circle pancake and then add two more small scoops right on top to create the ears. You want them to attach so it becomes one pancake. (Also we like to make Minnie Mouse pancakes too, you know for the girls....Make sure you put the ears far enough apart and then using a spoon put two triangles in the middle of the ears, attached to the head to look like a bow.)

One is a regular pancake and the other is a chocolate chip pancakes. Make your pancake batter and then while the first side is baking sprinkle mini chocolate chips onto the pancake. Flip and allow them to finish cooking. Serve with syrup.

There's lots of other pancakes that we've made, but don't have pictures of them all. It's fun to play with your food!

Tuesday, August 30, 2011

Banana Bread Pancakes


{{Banana Bread Pancakes}}

(printer friendly version)

1 cup whole wheat flour

1 cup all purpose flour

2 teaspoons baking powder

1/4 teaspoon salt

1/4 cup brown sugar

1 teaspoon cinnamon

1/4 teaspoon nutmeg

2/3 to 1 cup milk

1 tablespoon vanilla extract

3 large ripe bananas, mashed

2 tablespoons butter, melted

mini chocolate chips, optional

In a large bowl, combine flour, baking powder, sugar, salt, cinnamon, and nutmeg in a large bowl. Measure out the milk and add the vanilla extract to it. Whisk together the dry ingredients and add in 2/3 cup milk and vanilla, stirring to combine. The mixture will still be dry. Add in mashed bananas and mix. Add in melted butter and stir until batter is somewhat smooth (add the additional 1/3 cup of milk here as needed to make the batter a smoother consistency).

Heat a skillet or grill on medium heat. Using a 1/3 cup measure, spoon batter into rounds and cook until bubbles form on top – about 2-3 minutes. Flip and cook for a minute or two more. Repeat with remaining batter. Serve hot with butter and syrup.... Mmmmm....Or to make it even better yet.....sprinkle with mini chocolate chips... sprinkle to your little hearts content.

Another fun way to serve the pancakes... turn them into a monkey! I pulled out about 1 cup of batter and added 1/2 tablespoon of cocoa powder to make darker pancakes. Grill up a large monkey head, a medium sized mouth and two smaller ears. Decorate with 2 regular sized chocolate chip eyes and mini chocolate chips for the mouth. Accessorize the monkey with the monkey's favorite treat... a banana!

Mmmmmm.... I love breakfast! Don't you?

LinkWithin

Related Posts Plugin for WordPress, Blogger...