Showing posts with label Recipe. Show all posts

Saturday, April 12, 2014

Chocolate Dipped Easter Treats

I love these chocolate dipped peanut butter eggs and they are made even more delicious with the addition of some rice crispy cereal. The crunchy outer chocolate shell, the inner soft chewy comforting flavor of the peanut butter, made a lot better with the crispy cereal.
 

Without further ado.... The recipe for these bad boys is coming right up.

{{Crispy Peanut Butter Balls}}

(Printer friendly version click here)


1 stick butter, melted
1 lb. powdered sugar (2 ½ cups)
1 (18 oz.) jar peanut butter
3 1/2 c. Rice Krispies

Mix together all the ingredients using a paddle attachment of a kitchen aid stand mixer. Using a cookie scoop, measure out the peanut butter fondant and then roll into balls the size of walnuts. Chill 2 hours on a cookie sheet.

In a double boiler, melt
2 bags chocolate chips
Optional: Add to chocolate chips a small piece of paraffin wax (This will make the chocolate shinier and easier to dip balls.)

Drop a peanut butter ball into the chocolate, and using a fork, cover the ball. Tap off excess chocolate and then set on wax paper/parchment paper covered cookie sheet. Chill until set. Remove and layer in container with wax paper. Store in refrigerator. 


After I dipped all the peanut butter balls I had chocolate left over. I grabbed a package of bunny peeps and dipped them as well. Start by pushing a stick inside the marshmallow, then dip into the chocolate. After they are laid down on a piece of parchment paper, add a mini marshmallow tail on the butt of the bunny. 


Let them set up and then serve. The kids thought these were adorable and they FLEW off the plate. Even the kids that don't really like Peeps, liked these chocolate dipped ones. That's what chocolate can do for things. It just makes everything better.

Peanut Butter balls... done. Package of Peeps... done. Still more chocolate left. What to do now with that chocolate??? I saw the mini marshmallows sitting there and remembered something my mom would do when I was little. I raided the pantry and found some Roasted and Salted peanuts.... perfect!

Now it was time to make some Rocky Road Candy! Mmmmmm... Yummy!

The leftover chocolate in the bottom of the pan will always vary so there isn't a set recipe, but basically. Toss in some mini marshmallows, add some peanuts and stir. You can drop tablespoons of the mixture onto some waxed paper or put it into lightly greased pan (if you have that much) and cut it into squares after to serve.

Either way... it is a yummy way to keep yourself from wasting any of this delectable chocolate. The salty peanuts... the soft and sweet marshmallows, and the rich chocolate... Everything you need in a quick treat.


Homemade Butterfinger Eggs

Only 3 ingredients to make these... and one of the ingredients is a total shock. Candy Corn! But as everyone was tasting these eggs, they were surprised to realize how much they tasted like a real Butterfinger treat.

They are really super easy to make. The only reason they take a while is because of setting time in the fridge or freezer. Kinda fun to try and make.

{{Homemade Butterfinger Eggs}}


(Click here for printer friendly version)


16 ounces candy corn
16 ounces peanut butter
16 ounces milk chocolate chips

Melt candy corn in a saucepan over low heat, stirring until completely melted. Will take a while and will first look very crumbly and then it ends up looking like liquid playdough.
Add in peanut butter and mix until thoroughly combined.
Mixture will be warm so using a cookie scoop pull out the mixture and put onto a piece of parchment paper. Then form into an egg shape and place back on parchment paper to set.
Place in freezer to set and leave in the freezer for a few hours.
Melt chocolate in a double boiler over hot boiling water (or in the microwave by heating in 30 second intervals) stirring until completely melted.
Brush any crumbs off of the egg shaped butterfinger mix and then drop into the melted chocolate. Using a fork coat the egg completely in chocolate and then return back to parchment paper. Leave in a cool place to set or in the refrigerator. Store in an airtight container.
Makes 16.

Monday, March 24, 2014

Frito Dip

Best new dip ever! Cream Cheese Chili Dip.


I've made it several times for a varieties of parties and it is always a HUGE hit!

And the best part... there are only 2 ingredients in the dip. That's it! When people taste it and try to guess... they always guess many more ingredients than are actually included. Chili and Cream Cheese. That's all you need! And of course something to transport this delicious dip to your mouth!


 It's so easy to make. You can make it on the stove or you can make it in the microwave. You want to use a high quality chili... I like the Hormel Chili with Beans best. And then cream cheese... you can even use the low fat kind to make it a little less guilt inflicting when you are eating it. Put them together in the pan or bowl and heat them up. Make sure to stir it a few times while you are heating it up and then you are done. Pour it into a serving bowl (or eat it straight out of the pan)


{{Chili Cream Cheese Dip}}
 
(printer friendly version...click here)

1 (8 oz) block of softened cream cheese
1 (15 oz) can of high quality chili (Hormel or Dennison)

Warm ingredients until blended in a pot on the stove or in the microwave for 1-2 minutes. Serve with corn chips (Fritos).

Enjoy!


Monday, March 17, 2014

St Patrick's Day Fun

Love this fun Green Day!

It started this morning with the kids running around to see what our naughty little Leprechaun did to the house.  For some reason he likes to snag a shoe from each child in the house and fill it with some treats or gifts. This year they got golden rolos and skittles, plus a fun new pair of glasses. Sammie & Anthony got the cool aviators while Jared's has an orange mustache attached to his green glasses and Morgan got the 80s Shamrock shades.

A few little tricks that silly little guy worked on while we were all soundly sleeping...
  • He colored the toilet water green and unrolled the toilet paper a bit. 
  • He arranged the kid's alphabet magnets into the word lucky and then sprinkled some rolos around there too.
  • The kitchen chairs were left in complete disarray...turned over and on top of each other.
  • Some of the family pictures had funny faces and mustache's drawn onto the photo.
  • Finally the milk was turned green. 
Silly little mischievous leprechaun. 


After the tricks were found it was time to eat some breakfast. We went simple this year.... LUCKY CHARMS... cuz "They're magically delicious!" Served along with the leprechaun tinted green milk.

Plus to add some fruits and veggies into their breakfast we had some Turtle Juice Smoothies. 

{{Turtle Juice Smoothie}}

(Printer Friendly Version... click here)

2 frozen bananas
1 big handful of fresh spinach
1 yogurt (flavor of your choice)
2 cups fresh or frozen fruit (strawberries, blueberries, one apple, can of pineapple, one orange, raspberries, etc.)
2 cups juice, any kind
1 cup water
1 tsp vanilla
Blend all ingredients in a blender.
Will be different every time depending on the fruit chosen.

Pina Colada = pineapple juice, pineapple, banana, spinach and pina colada yogurt.
Blueberry Monster = blueberries, banana, spinach, vanilla yogurt, any juice.
This recipe was originally created by my friend Gina Smith and we use it all the time. We vary the fruit and juice to alter the flavor a little, but there is always a BIG ole handful of spinach added to the blender. When I first started making this the kids had no idea they were eating so much spinach, then they saw me doing it and at first they wanted to be abhorred... until I mentioned to them that they'd been eating it for quite some time. They paused... and realized it was true and they don't even complain anymore... they even pull out the spinach leaves when we go to make our green smoothies.

While the kids were happily munching on their cereal and smoothies... I was getting their green lunches ready. I made them a PB&J Shamrock sandwich, a green squeezie applesauce, a green Sprite, a green Fruit by the Foot, a green apple, green Sour Cream & Onion chips (the bag was green at least), and for dessert some Thin Mint cookies. They were super excited about the lunch since they got things that they don't normally get to have. FUN! That's what the holidays are all about. I also went here and printed out a lunch box tag to put in their lunch too.


After lunches were packed, and teeth were brushed... we stopped to take some pictures of their green-ness before they left. Sammie had a green strip of hair that we clipped into her hair and a green scarf. Jared brushed his hair up into a faux-hauk and then I sprayed it with temporary green hair color that we picked up on clearance after Halloween.

Then they were off to school!

When school was over and they busted through the door... they were welcomed by this lovely little rainbow snack. I've seen a bunch of variations and basically just pulled together what I thought my kids would enjoy the most.

Red= Strawberries (or could use raspberries, watermelon, cherries)
Orange= Mandarin Orange slices (or fresh clementines/orange slices, cantaloupe, )
Yellow= Pineapple Chunks (almost did bananas but the pineapple was more yellow)
Green= Green Apples (or kiwi, green grapes, honeydew,)
Blue= Blueberries
Purple= Purple Grapes


I gathered up the rolos that had been scattered everywhere by the leprechaun and used those to create my gold at the end of the rainbow. The puffy white cloud at the other end of the rainbow is a creamy fruit dip that growing up we affectionately called Angel Dip. It is a very popular dip and SUPER easy to make. Only 2 ingredients needed. ***If you've never made this before... you really need to. You don't know it, but something has been missing from your life... and it is this dip. You can mix things into the dip to turn it into different fun flavors, etc, but in its original form, it's a CLASSIC!

{{Angel Dip}}

(Printer friendly version... click here)

1 8-oz pkg. cream cheese, softened (nonfat works great)
1 7-oz jar marshmallow crème
Using an electric mixer or food processor, blend ingredients until mixed thoroughly. Refrigerate. Serve with fresh fruit, such as strawberries, cantaloupe, grapes, watermelon, etc.


For dinner we always have a corned beef roast & vegetables. I pick up the corned beef at the grocery store or Cost-co and the directions for cooking them are right on the package. It has a yummy flavor that is different than a typical steak. This year I threw everything into my crock pot.


  1. First there is a layer of cut up celery, carrots, onions (and you can add potatoes, but I didn't this year).
  2. Then I put wedges of cabbage on top of the veggies. (Best to keep the cabbage out and add it in half way through cooking though so it doesn't get too soft.)
  3. Next comes the roast and I sprinkled a few of the celery, onions, & carrots on top of the roast.
  4. The corned beef comes with a little package of pickling spices that you will want to save and then sprinkle over the top of the roast and veggies.
  5. I made 2 cups of beef broth and poured that into the bottom of the crock pot.
  6. Cooked everything on high for 4 hours and then when we pulled everything out it was perfect. We sliced up the meat against the grain, added some of the veggies to the plate with a pile of rice (you can spoon the broth over the rice if you want, or thicken it up for a gravy).
You can't go wrong with a slow cooker meal, especially one that is easy and turns out great. Click here for the full recipe.


Along with dinner we had some green leprechaun juice. My 11 year old daughter Sammie adorned our glasses with a cute little dry erase marker mustache. She loves to set the table for holidays... she pulls out tablecloths and place mats and tries to make things match and look cute. (So proud of my little Sammie!)
For this juice, I just kinda improvised with what I had.

{{Leprechaun Juice}}

1 frozen can of limeade concentrate
1 frozen can of lemonade concentrate 
2 liter of Sprite
Green food coloring

Mix it all together and serve. 

Finally it was time for dessert... It's so hard to pick just one... So I picked two. (Even that was difficult... there are so many fun things to make for each holiday.) Here's what I made... one thing new and the other was tried and true... an oldie but goodie!

The first treat I tried today was the Lucky Charm treats. Basically a rice crispie treat but instead of using rice crispies, I used the lucky charms cereal. I thought they might taste extra sweet since the cereal has a coating of sugar on it, but it tasted like cheerios covered in marshmallows. Fun! My baby couldn't wait to get his little hands on them!


Finally... the oldie but goodie. Mint Brownies. And since there is a certain someone in my house that doesn't like mint in, there was a third of the brownies that didn't include the mint frosting... just the chocolate... And those kind are good too! If you want the recipe for these brownies... click here.

Oh yeah... one more thing. I thought I had mint extract in my pantry and while I was making the frosting I couldn't find any minty extracts anywhere. They were all gone! I was committed to these brownies... the kids were depending on them... I'd already told them that they'd be having them. So in order to prevent a coup I did something I have never done before. I had a small vial of doTERRA Peppermint Essential Oil and I added in 3 drops of the oil to the frosting so they would be mint and it worked! I had heard that people cooked with the oils and so I tried it. I didn't want to run to the store for the extract. I should have started with 2 cause it seemed a little bit strong to me, but the kids didn't complain or even notice a difference. They were asking for more.


Another St. Patrick's day... done and over with. It was a busy but a fun day.  Now we get to start planning Easter! 

Thursday, November 21, 2013

How to Brine (& Roast) a Turkey -- with things you already have in your home!

Can you believe it's going to be Thanksgiving next week. I was realizing how close we are to Thanksgiving and that we should talk about the amazing results are of a turkey that has been soaked in a brine. I typically use a very simple salt and sugar brine. I've seen some pretty interesting combinations of stuff put into the brine solution.

Let's start at the very beginning. A very good place to start. The turkey. I've read that it is best to only brine a fresh turkey (one that has never been frozen) because the kind that have been frozen tend to have a salt solution injected into them to help preserve juiciness. I've brined a frozen turkey using this method and never had an issue with the meat being too salty. I always make sure to rinse it well and it has always turned out well.

The first time I ever attempted to brine a turkey, which was about 7 or 8 years ago, I didn't have the brining bags. I have used a variety of methods to soak the turkey in a brine and find that two clean trash bags work wonderfully if you don't have a brining bag on hand (like this one pictured from Williams Sonoma). They sell a set of 4 bags for $17.95. 2 small ones for a 5 lb chicken and 2 large ones that will hold up to a 23 pound turkey. And let me just say, once you start brining, you probably won't go back. It makes the breast of the turkey soooooo moist. Even the leftovers on the next day are still moist. It is A-MAAAAZING! But if you don't want to buy bags right away for your first time, then you can use a couple of regular tall kitchen trash bags.
 Brining Bags, Set of 4

Here's my cute little Tom turkey, in a bag and waiting for the brine to be added. It has been thawed (which was done in the refrigerator for at least 2-3 days prior to the day before Thanksgiving at no higher than 38 degrees Fahrenheit.), the innards were all removed, it has been rinsed, and then set into two large clean trash bags. For the brine I used a large 5 gallon jug or bucket and mixed all the stuff together. You can use a large pot or other container that will hold all the ingredients. 
 {{The first time I made a brine I didn't have a super large container for the brine so I just used a one gallon pitcher, added the sugar & salt, mixed it as well as I could, then put it into the trash bag, without the turkey, then added the rest of the water needed to cover the turkey. Then added the turkey. It worked wonderfully.}}

Some brines you have to cook and then wait for them to cool, but this one is simple. You take 2 cups of kosher salt (table salt will work too), 2 cups of white granulated sugar, and 2 1/2 gallons of cool water (not hot because you don't want to warm up your turkey and not cold because then the salt & sugar won't dissolve as easily). These are the ratios for a turkey that weighs about 12 -14 pounds and if your turkey is bigger then you will need a bit more water, salt and sugar. Keep it proportional... for every 1/2 gallon more of water add a 1/3 cup more salt and sugar. Stir the ingredients together.

It is important to keep your turkey cool while it brines. You don't want to just store it on the counter because it will get too warm. It needs to be kept cool. I can never store my turkey in the fridge during the holidays while it is brining because there is never enough room. I always have a bunch of pumpkin pies and other yummy holiday food crammed in there. You want to brine your turkey for about 4-6 hours minimum, but I usually start it at night before bed (10, 11 or midnight- depending on how much other stuff I still have to do before going to bed) and let it brine over night... for about 8-10 hours. 

You'll want to calculate backwards from when you want your turkey ready to serve. Here's an idea:
  1. Serve the Turkey at 1 PM.
  2. Remove Turkey at 12:30 to let it sit and rest for about 15-20 minutes before carving.
  3. A 12-16 pound turkey, that is unstuffed, will take about 2 1/2 - 3 hours to cook. 
  4. Between 9-10 AM you will want to have the bird in the oven. 
  5. 8:30 AM start dressing up the bird with whatever spices, butter, etc that you've chosen. 
  6. 8 AM pull the bird out of the brine, rinse, let it soak in water for 15 minutes, rinse again. 
  7. 11 PM the night before, start brining your bird, and it will be soaking for about 9 hours.

I've found a fantastic way to keep it cool and not take up space in the fridge. Use a cooler. First I layer some ice cubes in the bottom of the cooler, then I put my trash bags in the cooler, add the turkey, and add the brining liquid.

You'll want to remove the excess air so that the liquid is covering up the turkey and then seal up the bags. I used a small zip tie. It was effective and strong at keeping it closed, but you can use whatever you can find.

I noticed that my turkey would float to the top of the brining water and I wanted to keep it submerged. So after it was sealed up, we added a small bowl to the top so that when we close the lid on the cooler, it would push the turkey down fully into the liquid.

Finally we wanted to keep the turkey cool so we added ice cubes all around the turkey in his little salt bath. Closed the lid and came back 8 hours later and it was ready to start the roasting process.

This is a very important step. Rinse the turkey well. You want to get rid of any excess salt. Rinse the outside of the bird and use your hand to rub off salt. Make sure you rinse out the inside of the bird well as well. Then fill up the sink full of cold water and let your bird soak in the cold water bath for about 15 minutes. Then drain the water and rinse him again.

Pull the bird out of his bath and pat him dry with some paper towels. Let him rest on a clean dry towel to allow any excess water to drain out while you prepare your other ingredients for roasting.

Then he is ready for you to start roast. Everyone has a preferred method of roasting. Breast side up or down. High heat then low heat, only low heat, in a bag, or in a roaster. There are lots of ways. I've used multiple methods.

There's a simple Roasting method included here.

Start preheating your oven to 425 degrees. All you need is butter, some pepper and low sodium chicken broth. After the turkey has been rinsed let it sit and drain any excess water. Pat dry with paper towels. Mix 5 tablespoons of softened butter with 1/2 teaspoon of pepper. Rub this butter under the skin of the turkey, next to the turkey breast. Then take the 3 tablespoons of melted butter and brush that on the skin. The turkey is cold so it will solidify the butter. I sprinkled a little more pepper on top of the skin as well. (Then I stuffed some celery stalks, onion quarters and some carrots into the cavity of the bird. It wasn't stuffed full, just some vegetables to add some extra flavor.) Then in the bottom of your roasting pan, pour in the low sodium chicken broth to use for basting and to keep things from burning in the bottom of the pan.


Put the prepared turkey into the 425 degree Fahrenheit oven for 25 minutes. Baste and then rotate the roasting pan in the oven. Bake for an additional 25 minutes and then baste it again. Reduce the oven temperature to 325 degrees Fahrenheit. Continue to roast, baste and rotate the pan every 30-40 minutes. It will only need about an hour to an hour and half more (if it is about a 12 pound turkey). Keep cooking the turkey until the breast reaches an internal temperature of about 170 degrees and the thigh meat is 180 degrees. Pull out the turkey and let it sit for about 15-20 minutes before carving. 


{{Brining & Roasting A Turkey}}


Click here for printer friendly version

2 cups Coarse Kosher Salt
2 cups sugar
2 1/2 gallons cool water
1 (12 -14 pound) fresh, whole, bone-in skin-on turkey, rinsed and patted dry
5 tablespoons unsalted butter, softened
3 tablespoons unsalted butter, melted
1/2 teaspoon ground black pepper
1 cup low sodium chicken broth, wine or water
      
To Brine: Combine Kosher Salt and sugar in cool water in a large, clean stockpot or 5 gallon jug until completely dissolved. Place the whole turkey in the brine until completely submerged. Cover and refrigerate for 4 to 5 hours minimum (or cover with ice in a cooler) and up to 8-12 hours. Remove the turkey from the brine, rinse inside and out under cool running water for several minutes to remove all traces of salt. Fill up a sink of cold water and let the turkey sit in the water for about 15 minutes. Drain water, rinse inside and out again then pat dry with paper towels.


To Roast: Mix the softened butter with the pepper. Place turkey on rack in roasting pan. Rub the seasoned butter under the skin. Brush the skin with the melted butter. Pour the 1 cup liquid (wine, broth or water) over the pan bottom to prevent drippings from burning. Roast turkey at 450 degrees F for 25 minutes, baste and then rotate the roasting pan. Continue roasting until the skin turns golden brown, an additional 25 minutes; baste again. Reduce oven temperature to 325 degrees F; continue to roast, basting and rotating the pan once about halfway through cooking, until the *internal temperature reaches 170 degrees F for turkey breast meat and 180 degrees F for turkey thigh meat. Remove the turkey from the oven. Let stand 20 minutes before carving.

Happy Brining! Have a Happy Holiday!

Monday, November 18, 2013

Apple Cider Cupcakes with Salted Caramel Buttercream Frosting


Oh my goodness! These are A-MAAAAZE-ing! A friend of mine made these and brought them over to me and the kids and I had to fight over the extra cupcake. The flavor of the apple cider cupcake was fantastic. The caramel buttercream on top was a nice sweet that didn't over power and then the extra caramel drizzled on top, just added some chewy-ness that I loved. Sometimes my cakes stick with vanilla or chocolate... sometimes it's nice to "spice" things up a bit!

I immediately asked her for the recipe. She emailed it to me and said she got it from Pinterest. Yay! Well I went on to find out where it came from and there are about a bazillion different recipes out there for this cupcake. I'm not sure who made this specific one, but it is a success!

I made the cupcakes and had to share them with my neighbors.

They are so yummy! A great fall flavored cupcake. It is a nice spice cake that isn't too strong. Perfect for these cool fall days.

Here's the recipe:

{{Apple Cider Cupcakes with Salted Caramel Buttercream}}


(Printer Friendly Version... click here)

2 eggs, room temperature
1 2/3 cup flour
1 cup apple cider
2/3 cup sugar
1/2 cup butter, softened
2 tsp baking powder
1 tsp cinnamon
1/2 tsp salt
1 tsp vanilla

Beat the eggs and then whisk together all ingredients. Doesn’t even require a mixer. Can be made in one bowl. Fill cupcake liners 2/3 full and bake at 350º for 19 minutes. Remove and allow to cool completely before frosting.

Salted Caramel Buttercream
1/2 cup butter, softened
1/2 cup shortening
5-6 tbsp melted caramel -1/2 bag of Kraft caramels*
1 tsp sea salt
4 cups powdered sugar

In a stand mixer, cream together the butter and shortening. Add the powdered sugar and the caramel alternately (add the salt in with the caramel), mixing after each addition. Place the frosting into a pastry bag with a large circle tip (like 2A) and put the frosting on in a Round Swirl Pattern.

*The caramel is a little tricky just in that it needs to be the right temperature-- warm enough that it's still liquid and can blend into the buttercream, but not so hot that it melts the butter making everything too thin. Evaluate the buttercream at about 4 tbsp of caramel-- if it's getting way too thin, stop adding caramel or add more powdered sugar. I found that 6 Tbsp. was perfect for my batch.

Drizzle Topping

With the remaining caramels, unwrap the caramels and place into a bowl. Add about a tablespoon of heavy cream (or milk). Microwave on high for a minute and stir. Microwave at 30 second intervals and stir in between until caramel is melted and has an even consistency. Allow the caramel to cool slightly (so it doesn’t melt the frosting), and then drizzle it over the frosted cupcakes. 

And then if you still have some melted caramel left over... you can cut up some apples and dip them in there... while you eat this Awesome Autumn Cupcake!

Monday, November 11, 2013

Homemade Vanilla Sugar


What happens when you take two yummy things and put them together? You get something even better. Today we mixed together white granulated sugar and vanilla beans and made Vanilla Sugar! It takes ordinary sugar to extraordinary! Vanilla sugar, when used alone, adds a subtle flavor. It can also be used to replace vanilla extract in a recipe (1 tbsp. vanilla sugar=1/4 tsp. vanilla extract), or can be used in addition to the extract to add more flavor & dimension to your baked goods.
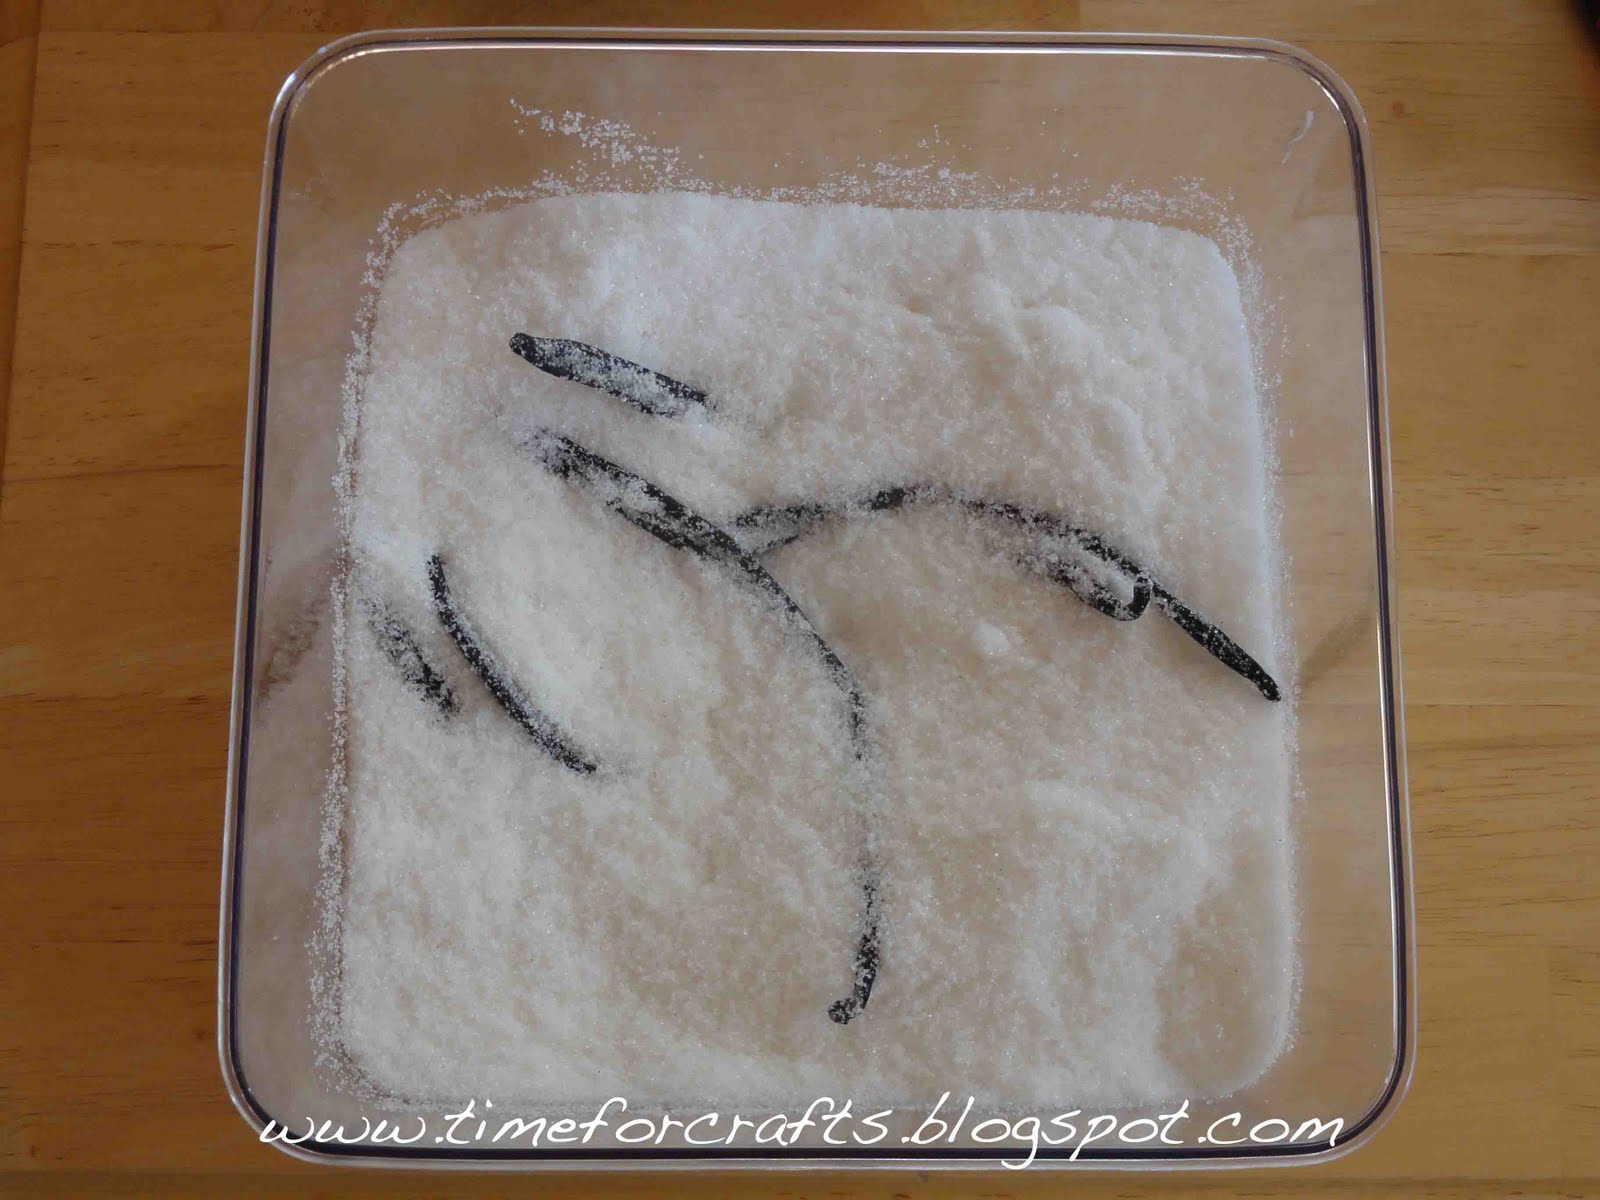


There are TONS of different types of vanilla beans out there. I've seen counts of over 200 vanilla bean varieties... say what!? That's crazy! Some popular bean varieties include Madagascar, Tongan, Tahitian, Mexican, Indian, Indonesian, Bourbon, etc and they all have varying flavor. I've used the Madagascar Bourbon vanilla beans- because during my research I learned they were the best for making vanilla extracts and sugars. (I do want to try the Tahitian and Mexican next though.) The flavor of this Madagascar bean is great for cooking with (whether you make an extract--post to come soon, or if you make the vanilla sugar).  Once you start looking online you might be overwhelmed at all the varieties of vanilla beans. One word of caution.... DON'T buy them at the grocery store. They come in a small bottle and it costs like $12 for only 1, maybe 2 beans. Ridiculous! The best way to buy your beans is to get them online. I've bought them here at Olive Nation. They have free shipping on all vanilla bean orders. The more you buy, the better the deal is. I've ordered from here several times, and they were great quality beans when I received them I was able to make a bunch of different things. Plus they can be stored for future use.

The beans aren't very attractive, but as soon as you open the package, the sweet aroma of creamy vanilla will fill the room. Here is one thing that you can do with the vanilla beans... make vanilla sugar. It's simple and will only take 5 minutes.

In order to make the vanilla sugar, you need 2 ingredients. Sugar & vanilla beans.

That's it! And 1 to 2 weeks later, you can start using the sugar that has been infused with the flavor of the vanilla beans.

There is so much flavor in a single vanilla bean that you can continue to add fresh sugar to the container with the bean and it will continue to make more and more vanilla sugar. You can do this for about 6 months. Awesome!

How to Cut A Vanilla Bean: Lay the bean flat on wax paper (so you don't lose any precious seeds) on a cutting surface. Carefully cut at the center, then cut toward each end. Once the bean is split open, scrape the tiny seeds out with the blade of the knife or the tip of a spoon. (By cutting the bean open before placing it in the sugar, more surfaces of the bean is exposed, intensifying the flavoring properties.) 


{{Vanilla Sugar}}

(printer friendly version click here)

1 vanilla bean, whole or scraped
2 cups granulated sugar (can also use confectioners' sugar)

First rinse off the vanilla bean with water and pat it dry. Then take the whole vanilla bean and slice down the side of bean with the back of a knife (or a spoon) and scrape out the black gooey seeds. Stir the seeds into the sugar that is in an airtight container. Bury the bean in the sugar as well and seal tightly with lid. Let sit for 1 to 2 weeks. Use in place of any recipe that calls for regular, granulated sugar. More sugar can be added to the same beans for up to 6 months and the bean will continue to flavor the sugar.


Suggested ways to use the Vanilla Sugar: (possibilities are endless)
  • Sprinkle it directly on cookies, muffins, cereal, oatmeal, tea, coffee, hot chocolate, and other beverages.
  • Kettle Corn Popcorn
  • Put the sugar in a cute air tight container, add a ribbon & give as a gift! Add it to a gift basket of other goodies that the sugar can be used with. 
  • Baking--
    • Snickerdoodles & SuperDoodles
    • Sugar Cookies
    • Cakes (especially white cakes)
    • Fruit Desserts
    • Puddings 

Tuesday, November 5, 2013

Cheesy Bacon Ranch Dip

Holidays are here. That means it's time to party. There's always tons of party's to attend and when you have to bring something for a potluck or to share, this is a fantastic dip to bring. With busy schedules it's nice that it is so easy to make, but really packs a punch. It's crazy addicting.


{{Cheesy Bacon Ranch Dip}}

(printer friendly version click here)

16 oz sour cream
1 packet Ranch dressing mix
3 oz real bacon bits (the kind in the bag)
1 cup shredded cheddar cheese
2 green onions, chopped

Mix together sour cream, packet of Ranch Dressing mix, bacon bits, and shredded cheese. Then refrigerate the dip for at least 24 hours. Garnish with green onions. Serve with crackers.

**Can also serve with chips or veggies.


 Okay... go make some. Mmmmm.....

Monday, October 21, 2013

Halloween Candy Coma Bark

Just like it says in the name… this bark is candy coma goodness. You might have to call the dentist and set up an appointment before you eat this, cuz you’ll probably get a cavity just from looking at all this sweetness. At least I will.  


It kinda includes everything that says Halloween and for sure everything that says YUM! I don’t have exact measurements on how much of each ingredient was used. I bought bag fulls of everything and then just eyeballed it from there. (I was able to make 2 big trays of the bark with some leftover candy, cookies, nuts & pretzels. You can add as little or as much as you want.) Here’s the list of ingredients needed:
  • Oreo Cookies (more festive with the orange cream, but they were gone when I went to buy everything so I just got white cream.)
  • Pretzel sticks, broken in half-ish
  • Roasted Peanuts
  • Peanut M&M’s (or plain if you want)
  • Reese’s Pieces
  • Chocolate Chips
  • Candy Corn (I used the caramel candy corn because that was all that was left when I went to buy the stuff… it’s only four more days to Halloween and the regular kind was all gone. I would typically use the regular one, but the caramel one worked just fine… it gave the candy that chewy goodness.)
  • Halloween colored sprinkles or nonpareils candy.
  • Almond Bark (or white chocolate chips)
Here are the steps to making the candy bark....


  1.  I mixed all the ingredients in a bowl except for the sprinkles & almond bark. I melted the almond bark. On a large cookie sheet I lined it with parchment paper (could use waxed paper). Then I spread a thin layer of chocolate on the paper to begin binding everything together.
  2. I sprinkled a layer of the candy/pretzel/nut mix onto the melted chocolate layer. Try not to make this layer tooo thick because when you break it all apart later, pieces will fall out, but it is the best part so don’t skimp. A nice moderate layer. =)
  3. Now take the rest of the almond bark and drizzle it over the middle candy layer.
  4. Sprinkle some more of the candy on top to make it look pretty, and finally sprinkle the nonpareils candy on top for an extra pop of color.
  5. Put the candy in the refrigerator to help the chocolate set faster. When it has fully hardened (after about 30 minutes to an hour), pull it out and break the candy into pieces.
  6. Put the candy into cellophane bags and tie it off with some cute ribbon. Done!
The whole process took a little over an hour, because of the cooling time. I took this candy to 2 different activities and both times… everyone was raving! Delish!

It can also be packaged up to give away in a small cellophane with some ribbon.

LinkWithin

Related Posts Plugin for WordPress, Blogger...