Showing posts with label Bread. Show all posts

Tuesday, March 4, 2014

After School Snacks

The kids are ALWAYS famished when they come home from school. Always! Sometimes I just let them grab something from the SNACK bucket in the pantry, or a fruit, and sometimes I made them a snack to eat. It all depends on how much time I have and when we will be eating dinner.

Today I took 5 minutes and put together this plate of snacks for them when they came home from school. They gobbled it up in minutes. (It is amazing that they can put away so much food sometimes.)

A few days ago I had made some banana bread in mini loaf pans. I cut up the last loaf and spread it out on the plate. I broke apart some graham crackers and spread peanut butter on one side and then turned it into a little sandwich. That's it graham crackers and peanut butter- it kinda tastes like a quick and easy peanut butter cookie. Finally, I sliced up a green apple (somehow the kids developed a preference for green apples over the red- so that's what they got). 


Then it was done. They walked through the door... saw the plate, said hello and then I didn't hear much from them til there were only crumbs left on the plate and they were saying, "That was an AWESOME snack Mom!" (Mission Accomplished!)

Then it was time to do homework.

Wednesday, October 16, 2013

Chocolate Chip Pumpkin Bread--- Super Fancy!

Fall is here and this is a good way to enjoy it! Chocolate Chip Pumpkin Bread. But let's not just do it the plain old fashioned way... let's do it in a better way.


Here it is... a better way to eat Pumpkin Bread. You might say, how can there be a better way to eat pumpkin bread. It is pretty much Fall Perfection in a Loaf Pan. Right? However... a way has been found. Cover it up with chocolate. True, it's already filled up with some chocolate chips, and then it just gets better with a little more chocolate on top. I made about 8 loaves (mini loaf pans) of this the other day. I gave away about 4 of them. The rest were devoured by my kids. They loved it! You must try it! You must make some! Must!!


Without further ado... Here's the recipe:


{{Chocolate Chip Pumpkin Bread}}


¾ cup sugar
¾ cup brown sugar
2 eggs
½ cup unsweetened applesauce
1 cup pumpkin
1 teaspoon baking soda
1 teaspoon cinnamon
½ teaspoon salt
½  teaspoon nutmeg
¼ tsp allspice
¼ tsp ground cloves
1 ¾ cups flour
⅓ cup milk
1 cup miniature chocolate chips
½ cup chocolate chips
¼ cup white chocolate chips
1 ½ teaspoons shortening

In a mixing bowl beat the sugars, and eggs until creamy. Add the applesauce and pumpkin then beat again. Sift together the baking soda, cinnamon, salt, nutmeg, allspice, cloves, and flour. Add to the pumpkin mixture alternately with the milk. Stir in the mini chocolate chips by hand.
Spread the batter in a greased 9x5 loaf pan. Bake at 350* for 60-70 minutes. Cool in the pan for 15 minutes, then flip out onto a wire rack to cool completely.
Place the chocolate chips and 1 teaspoon shortening in a microwave safe bowl. Heat for 30 seconds. Stir and heat again for 15-20 seconds. Set aside and repeat with the white chips and remaining shortening. Spoon the melted white chips into a plastic baggie with one tip cut off.
Spoon the melted chocolate chips on the top of the bread. Go to the edge, but be careful to not push the chocolate over. Immediately drizzle the white chocolate from side to side. Use a toothpick to draw lines from end to end. Work quickly before the chocolate sets up. Makes 1 loaf.

(Makes 4 small loaf pans with this recipe. Add a little over a cup of batter per pan. Cook for about 35-40 minutes. These are the perfect size for giving away a small treat to your friends. You'll want to share. It's just that good!) Wrap it up in a cellophane bag and tie it up with some fall ribbons & twine. This would be a great neighbor gift for Christmas too. Tie a tag on with the recipe and share this yummy-ness.


Now that you have the recipe... just a few more notes. 
It's not just fancy and pretty... it's DELICIOUS too and with no oil in it... you could almost call it healthy.  I found it here originally and then changed up the recipe a bit. More spices, less oil.

I have made this recipe with less chocolate chips inside the bread and it still turns out good. So if you think that it will be TOOOOO chocolatey (I'm not even sure I know what that is, but some people feel this way!) then you can reduce the mini chocolate chips to about 1/2 cup - 3/4 cup instead.  You can tell there is a little bit less chocolate chip goodness in this loaf of bread, but it is still delicious. So much yummy flavor filling up the pumpkin and spices. With less chocolate, the nutmeg and cinnamon can really shine.


When making the design on top... you want to work quickly and keep the chocolate warm and melty so that when you put the white drizzle on top it will melt into it and become one layer of chocolateness. You can cut a tiny hole in the ziploc/pastry bag filled white chocolate for a smaller more intricate design...

Or you can cut a bigger hole in the bag and pipe more chocolate on top for a bolder look.


See the difference... But it's gonna be yummy either way that you do it.


Happy Fall Y'all! Love it. It truly feels like Fall has begun with this spicy pumpkin smell in the air and that cool crisp feeling outside. The leaves are changing and it's so much fun. Yum!

Sunday, October 6, 2013

Snap Doodle... Breakfast Ready in a SNAP!

This is one of the yummiest breakfasts. Warning! It isn't healthy, but boy is it yummy and slightly addicting. But what do you expect when you cut up a cube of butter and put it all over the top! There's brown sugar and cinnamon sprinkled all over the top of the batter and then when you add the butter on top, there are these deep crevices of yumminess that appear.... they are almost a little bit of heaven on your breakfast plate!


This is how it looks when it come out of the oven. Mmmm... it looks so good. Let's talk about how to make it.


First... here's the recipe....
{{Snap Doodle}}

Printer friendly version... click here

1 egg
½ c. white sugar
1 c. milk
2 c. flour (1 cup all purpose flour, 1 cup whole wheat flour)
1 T. baking powder
pinch of salt
½ c. brown sugar
cinnamon
6 T. Butter


Break egg in bowl; beat slightly. Add white sugar and stir then add milk all at once. Sift together flour, baking powder and salt and then add to the liquid mixture. Pour into a greased 7½ x 12-inch pan. Sprinkle brown sugar over the batter and then sprinkle cinnamon on top. Cut butter into pieces and drop on top of the brown sugar and cinnamon. Bake at 350 degrees for 30 minutes. (Bake at 325 if you are using a glass pan.) Allow to cool for a few minutes, and then serve with cold milk. Yield: 6 servings.

First you make the batter.... Basically you will mix together the first 6 ingredients. Put that batter into a greased pan... here I am using an 8x10 pan and I've doubled the recipe. But it will look the same even in a smaller pan... The recipe calls for a 7 1/2 by 12 inch pan... If I'm making only a single recipe I will just use a 8x8 pan.


This is where the fun begins. After the batter is in the pan, you sprinkle brown sugar all over the top of it. I don't even measure this anymore. The recipe calls for a 1/2 cup... I probably use a bit more than that. Put a nice layer of brown sugar over the top of the batter.


Next comes the cinnamon. Again I don't measure this anymore, I open up the cinnamon and sprinkle a nice contrasting layer on top of the sugar.


See... a nice light and dark contrast. But it only gets better, one more layer to go. The butter layer.


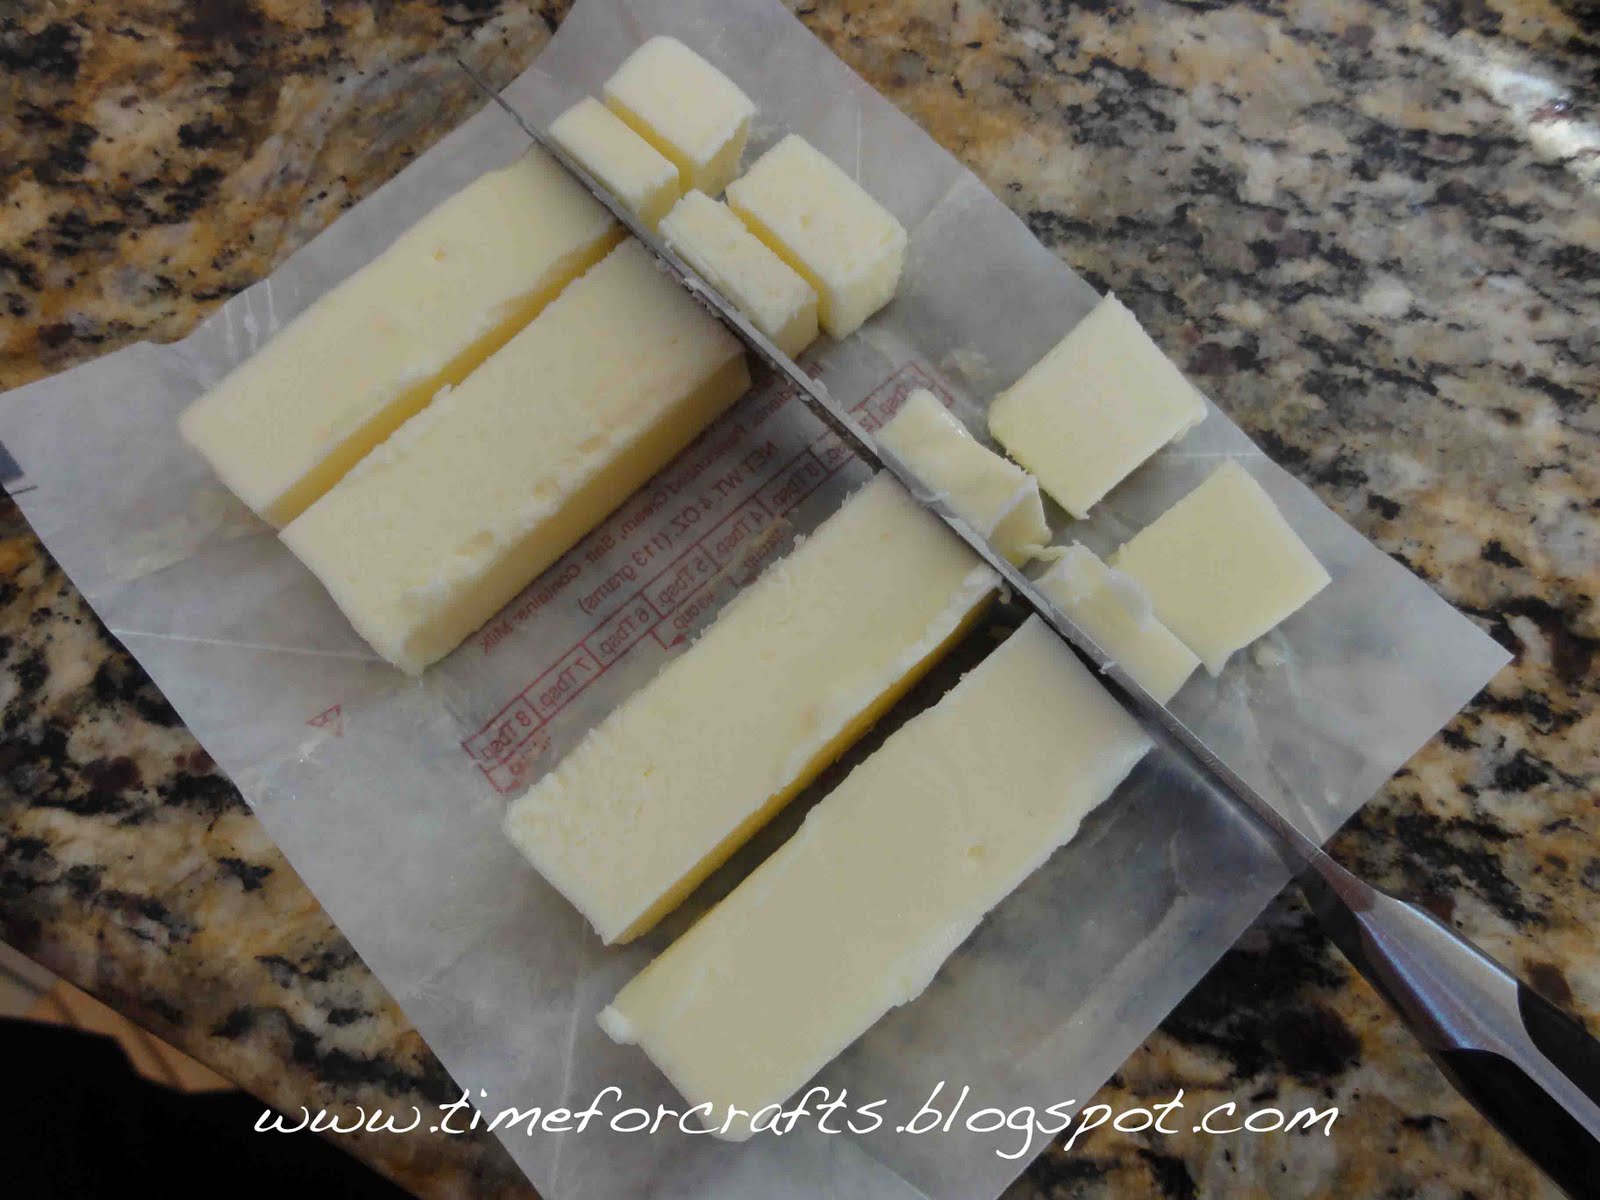
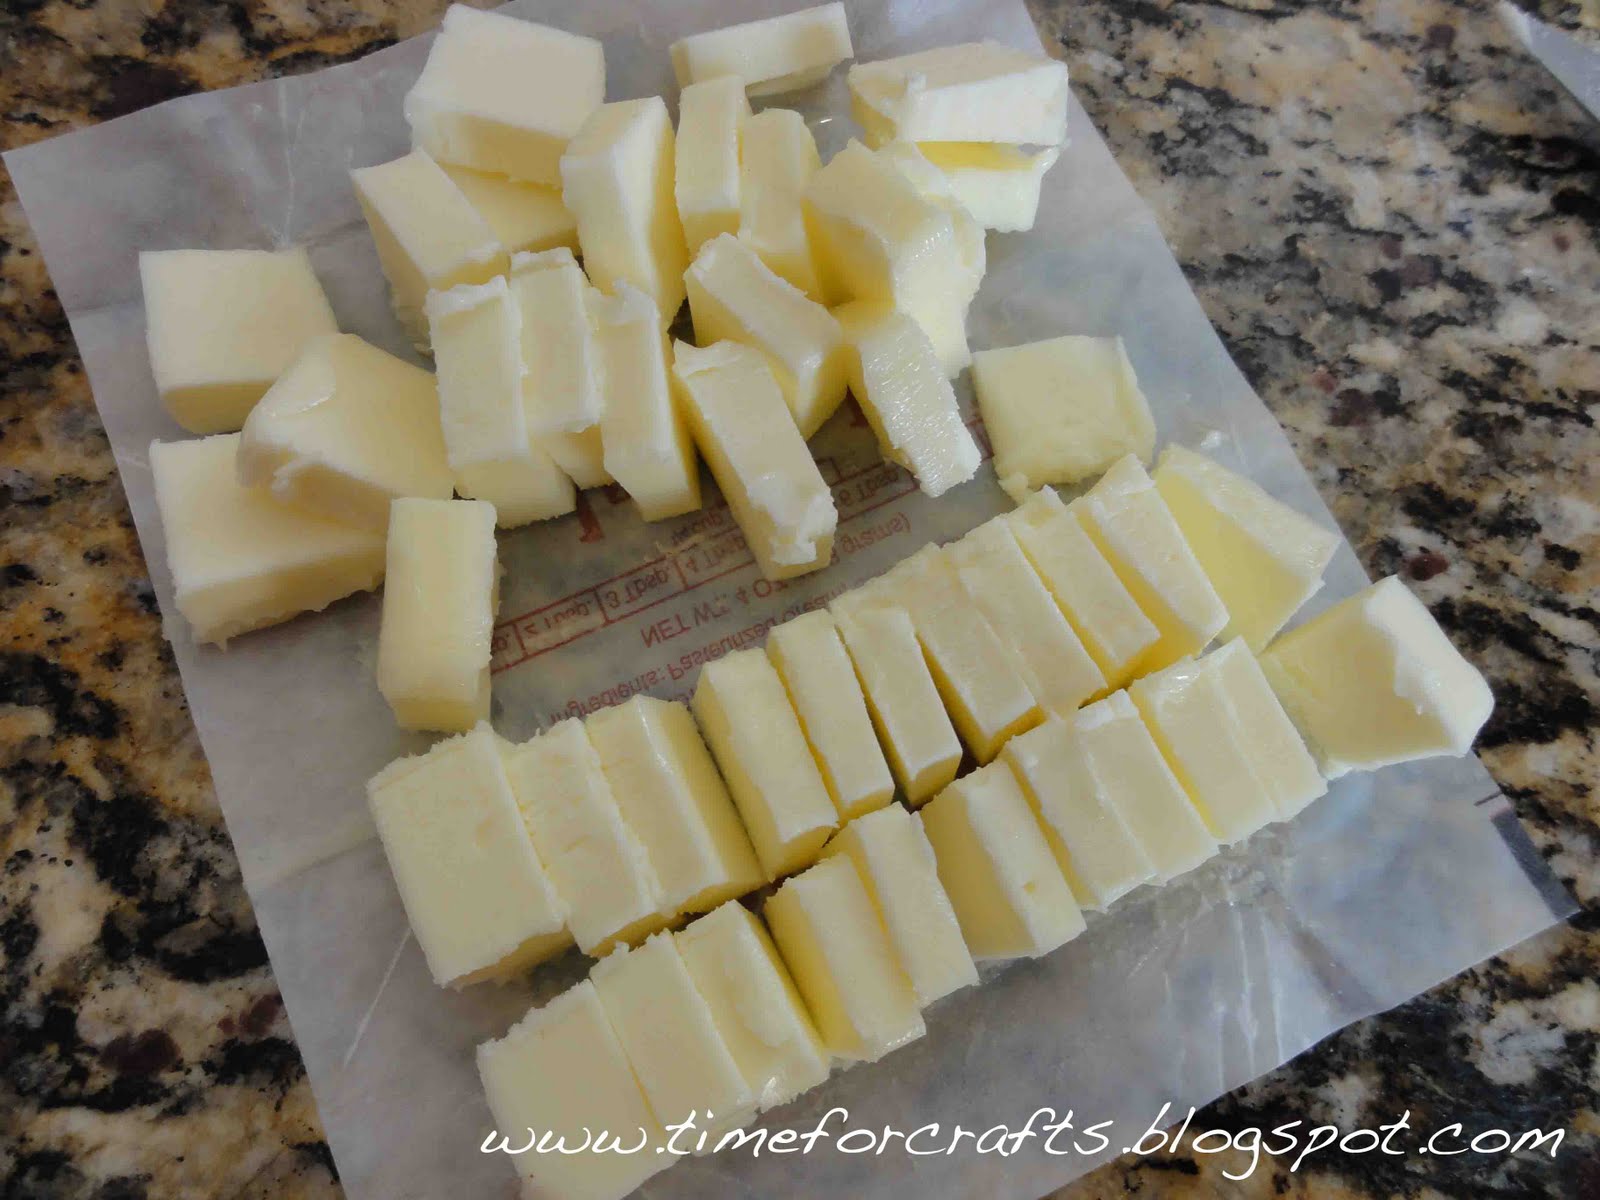
This is how I like to do it. Take a softened cube of butter (again this is for a double batch, only 6 Tablespoons for a single bath). Cut the butter up into little pats. I like to cut it in half, then in half again.
Then I take each piece and cut them again into little pats.


Now you randomly sprinkle the pieces of butter all over the top, taking care to poke a few of them into the sugar and batter.


Cause when you push the butter in, ... these are the types of amazing-ness that will develop. It seems to be random where and how these crevices take shape, but they are the coveted pieces.  

Here's a close up of some of the trenches of Terrific Gooey-ness. It is a buttery, sugary pool of sweetness that tastes so good next to the bread that carries the manna of sugariness to your mouth.


Mmmmmm.... Mmmmmmmm... GOOD!


This is usually how we like to eat our Snap Doodle! A warm, gooey slice of snap doodle... a tall glass of cold milk, and some fresh fruit on the side. Perfect!
 
It's basically a coffee cake so you could enjoy it any time of day, but it is a great way to start off your day.

Thursday, September 22, 2011

Chicken and Rice Soup

Mmmm... Fall is here! I am so excited! While the weather has cooled off a bit, it is still pretty hot outside during the day. However the evenings do cool off... not to a point that soup is fully warranted, but it was still fun to make one of my favorite soup recipes.

Typically I make this soup on the stove top, but since it is still pretty hot during the day, I decided to try making it in the crock pot. And it turned out wonderfully!
Here's the recipe...

{{Chicken & Rice Soup}}
(printer friendly version)

1 Rotisserie Chicken, already cooked (from Cost-co or other grocery store)
Water
1 cup celery, chopped
1/2 large onion, diced (can substitute ~2 Tablespoons dried minced onion)
1 teaspoon sea salt
1/2 teaspoon black pepper
1 Tablespoon crushed garlic
2 teaspoons oregano
1 bay leaf
1 cup minute rice
1 bag (16 oz.) frozen mixed veggies (any variety, I typically use corn, peas, beans & carrots)
Maggi Seasoning, for flavor and seasoning after

Place cooked rotisserie chicken in a pot. Add water until chicken is just barely covered. Add chopped celery, diced onion, sea salt, black pepper, crushed garlic, oregano, and bay leaf. Bring to a boil and then cover and allow to cook on medium heat for about an hour or two. This is the step that is making the yummy broth that is going to be the base for the soup. Remove chicken from the pot and let it sit out on a cutting board. Let the chicken cool so that you can remove the chicken from the bones. Add chicken back to the pot, plus 1 cup minute rice, and the bag of frozen mixed veggies. Cook on high for another 10-15 minutes until the rice and veggies are soft and tender. Serve with Maggi seasoning (described below) and some yummy rolls with butter!

**Crock Pot Method: Place cooked chicken into the crock pot. Cover chicken with water and add chopped celery, diced onion, sea salt, black pepper, crushed garlic, oregano, and bay leaf. Cover crock pot and cook high for about 4-6 hours. Remove chicken from the crock pot and let sit out on a cutting board. Let the chicken cool so that you can remove the chicken from the bones. Add chicken back to the crock pot, plus 1 cup minute rice, and the bag of frozen mixed veggies. Cook on high for another 30-45 minutes until the rice and veggies are soft and tender. Serve with Maggi seasoning and some yummy rolls and butter!

***I like using the Cost-co Rotisserie chickens because they tend to be a lot bigger than most grocery store chickens and they have more meat on them. Sometimes we will eat some of the rotisserie chicken for sandwiches and then use the rest of the meat, the chicken bones and an extra chicken breast to make the soup. The flavor of the rotisserie chicken is amazing and adds some great dimension to this soup. So even if you eat ALL the chicken off of the bones, you can still use the chicken bones to add flavor to the soup, and then cook some chicken breasts for the soup.

***This is also a great soup to make using left over turkey after THANKSGIVING! (It's only a two months away!) Turkey changes the flavor of the soup a bit, so it's like a whole new recipe!


Chop your celery right off the bunch and then rinse the pieces in a colander, then dump the celery into the pot.

Click here to see a great way to dice your onion.

Here is a picture of the frozen mixed veggies that I normally use. I didn't have this mixture so I used some frozen corn & frozen peas instead. This part is completely adjustable. Pick veggies that you like and add those to your soup.

Mmmmm... It is a wonderful soup just like this... And only one more thing can make it better.

And that one more thing is this... Maggi! We enjoy this seasoning on hard boiled eggs, celery and radishes among other things, including this chicken & rice soup. It is a liquid seasoning and you can sprinkle a few dashes into your bowl of soup to add even more fun flavor. Most people probably don't have this, but you can find it at the grocery store... sometimes by soy sauces and sometimes by Asian foods.... just ask where it might be stored at your local grocery store.... and try it. It has a strong flavor so a little goes a long way.

These are just the frozen Rhodes rolls... defrosted and then baked! LOVE these things! They are so easy and so yummy when you don't have time to make rolls from scratch!
Mmmm... love cold winter just for all of the wonderful soup recipes I get to make again!

Tuesday, September 13, 2011

Pretzel Bites


Mmmm.... walking through the mall. You smell the yummy pretzels so you stop and get one or two or a cup full (you know the pretzel bites). Now some of that yummi-ness can be enjoyed from the comforts of your home. Rhodes frozen rolls are practically a staple in my freezer so these were something I was dying to make.

They turned out so good too. I ate about 12 before I got the platter out the door for the intended party.

Here are the rolls after they have been cut up. They are sitting on a cookie sheet, sprayed with cooking spray and then covered in plastic wrap.

Let them sit for about 35-45 minutes, until they get puffy.

Start a pot of boiling water and toss the unbaked dough into the water and toss them gently in the water for about 45 seconds. Pull them out of the water with a slotted spoon and let them drain on a paper towel.

After they have drained for a bit, place them on a greased cookie sheet. Bake them in a 350 degree oven for about 15 minutes, or until golden brown.
While they are in the oven, melt some butter. Mmmmmm... butter!

Pull out the toppings that you want for your pretzel bites. I made some plain and salty with a coarse sea salt, another set Parmesan cheese and finally some that are cinnamon sugar.

After they come out of the oven, they will look golden brown and are yummy and chewy just like this, but it only gets better and better with each step. Brush them with the melted butter and then sprinkle your toppings.
Here is a pile of parmesan cheese bites still on the baking sheet... still too hot to eat, but that didn't stop me from trying.

Finally they made it to the serving tray. I put the cheddar dip in the middle and then these are the parmesan cheese pretzel bites on one side and then the sea salt pretzel bites are on the other side. Both taste so delicious in the cheddar dip. I didn't add any garlic to these bites, but you can put all three toppings on one bath (salt, garlic powder & cheese) and they are yummy.

Here are the cinnamon sugar pretzel bites.... slathered in melted butter and then drenched in lots of cinnamon sugar.

They are YUMMY by themselves and extra YUMMY dipped in vanilla glaze.

{{Pretzel Bites}}

(printer friendly version)

Rhodes Frozen roll dough

*as many as you like – each roll makes four bites

coarse salt, parmesan cheese, garlic powder (not garlic salt), cinnamon & sugar
Vanilla Glaze or Cheddar Dip (optional, but delicious... recipe below)

Place frozen rolls on a plate so that they are not touching, spray lightly with cooking spray and cover with plastic wrap. Put rolls in the refrigerator overnight and keep them in the refrigerator until about two hours before you need the bites to be ready. (Remember: Note how many bites fit on your baking sheet and that it takes 15 minutes for them to bake in the oven. They will be ready to eat when they come out.

When you remove the rolls from the refrigerator they will be thawed, but won’t have started to rise. Take a thawed roll. Cut it in four equal sections, first in half and then each again in half. Place dough bites on greased sheets. Cover with plastic wrap that has been sprayed with non-stick cooking spray, and let dough rise until double in size (about 35-45 minutes). (While they are rising... this is a great time to make your dips if you want to have them for the bites.)

Bring a large pot of water to a gentle boil. When dough has risen, plop about 10 pieces into the boiling water, tossing gently for about 45 seconds. Remove with slotted spoon, and place bites on paper towels to drain slightly. Move bites to greased baking sheets, and bake at 375 degrees for about 15 minutes or until done and golden brown.
Brush bites with melted butter, sprinkle with Kosher or Sea Salt, Garlic Powder, toss in Parmesan cheese or any combination of these flavors. You can also make Cinnamon and Sugar bites. Make a mixture of Cinnamon and sugar, {{About 1 cup sugar and 1 1/2 tsp. of cinnamon, and mix together well.}} and after you butter the pretzel bites, toss them in the cinnamon and sugar mixture.
You can serve the Parmesan Pretzel bites with a cheddar dip, and the Cinnamon and Sugar Pretzel bites with Vanilla glaze. So yummy . . . so simple!

{{Vanilla Glaze}}

1 cup powdered sugar
2 tablespoons milk
1 tablespoon melted butter
1 tsp. vanilla extract.
Combine sugar, milk, butter and vanilla and mix well.

{{Cheddar Dip}}

1 Tablespoon butter
1 Tablespoon all purpose flour
1 cup milk
Salt & White Pepper to taste
1 1/2 to 2 cups of grated Cheddar Cheese.

Melt the butter in a medium size saucepan over medium heat. Add the flour and stir until blended, and butter has turned lightly golden brown. Slowly whisk in the milk and cook until thickened slightly. Season with salt and white pepper. Remove from heat and stir in the Cheddar Cheese until smooth and all of the cheese has melted. Optional: Shake a few red pepper flakes into sauce for added zing!


I found this recipe here, just get off your butt and bake... love it.

Monday, August 29, 2011

Buttery Biscuits... only 4 ingredients needed!

Easy, Easy, Easy, Easy and very buttery and delicious! These are the melt in your mouth kind of biscuits...

{{Buttery Biscuits}}


1/2 cup sour cream

1/2 cup 7-up

1/4 cup melted butter


Preheat oven to 450 degrees.


Cut sour cream into biscuit mix using a pastry blender, or two forks.


Add 7-Up. Makes a very soft dough.


Sprinkle additional biscuit mix on board or table and pat dough out. Using a circle biscuit cutter, cut the biscuits.


Melt 1/4 cup butter in a 9 inch square pan in the preheated oven. Place cut biscuits in pan and bake for about 15 minutes or until golden brown.


**Short-cut... Instead of rolling out and cutting biscuits, just drop biscuit dough into the buttered pan and bake. Voila... done! See... what did I tell you... easy, easy, easy, easy!


This is what the dough looked like after mixing the ingredients together.


And here is their golden goodness after they have baked in the hot oven! Mmmmm... Mmmmm... Mmmmmm....
Serve with butter, jelly, or with gravy.... so many possibilities.

LinkWithin

Related Posts Plugin for WordPress, Blogger...