Yummy treat... cinnamon bears. Their chewy cinnamonny sweetness! Awesome!
What could make them better? Ummm... duh! Chocolate! That brown gooey goodness makes everything better. The kids and I spent an hour or so making these little gifts for their school teacher.
Start with melted chocolate and a bag of cinnamon bears. You can melt the chocolate in a double boiler or an easier way is to do it in the microwave. Chocolate can burn easily so it is best to reduce the power of the microwave. Of course all microwaves are a little bit different so keep a close eye on the chocolate if it's the first time. I will microwave the chocolate for about a minute at a time at 60-70% power, stirring in between each interval. Then when most of chocolate is melted, I like to pull it out and stir it until the last few lumps melt so that the chocolate doesn't get tooo hot. When it's all ready, toss one of the bears into the melted chocolate bath.
Cover the bear up with a fork. Pick it up and tap it on the edge of the bowl and let the excess chococlate drip off back into the bowl.
Slide the bear off the fork onto a piece of parchment paper. Check to make sure that on the side where the bear slid off the fork it is covered up with chocolate.
The proceed to cover each little bear, one after another...
After all the bears had been dipped, for some fun I put the leftover chocolate into a pastry bag and drizzled it onto some of the bears. You could use a contrasting colored chocolate, white or some Wilton melts in any color to suit the holiday. This was just an easy way to add more chocolate to the bears.
I thought about only doing half the bear... but that was just crazy. Every part of the bear wants to be covered in the silky warm chocolate. It wouldn't be fair to leave out half of the bear.
After the bears take their warm chocolatly bath, it was time to let the bears cool off in a cool place (such as a refrigerator).... and then when the chocolate gets hard and set... you now it is time for the party in your mouth to begin! Mmmm.....
I put some chocolate covered cinnamon bears into the bag and then mixed them up with some plain cinnamon bears. I wasn't sure the teachers position on cinnamon bears. I thought... this way they'd have a choice... some with chocolate and some without.
I made a hand written tag using the Sale A Bration Stampin' Up set, which included the cellophane bags, the long striped tags the hexagon tags and the glittery heart stickers.
Showing posts with label Valentines. Show all posts
Thursday, February 13, 2014
Monday, February 10, 2014
Valentine Boxes
Our School Valentine boxes this year... Jared picked making a purple minion and Samantha decided to make her own Olaf box. The openings for the valentines & treats to enter the box is the mouth on both boxes.
Making the boxes...
It was pretty simple to make the boxes. We just used an empty 12 can soda box. We put packing tape over the openings (the one to carry the box & also the corner one where the soda comes out) so the box would be flat and easier to cover with paper. It took about 4 sheets of 8 1/2 x 11 inch papers to cover the box & they overlapped on the sides. We just used hot glue to hold the paper onto the box because it would dry quickly and hold strong. Once the boxes were covered, we were ready to embellish them.
Embellishing the boxes...
For the Purple Minion, we started by covering the bottom with some black to make the overalls. Two one-inch strips were put in the front and around to the back for the straps of the overalls. Next we moved to the top of the Minion. I cut strips of paper 3/4 to 1 inch wide, from 3 different shades of purple. Then we crimped the strips quickly and randomly by hand and covered the top of the box with the folded strips to make the Minions crazy hair.
Next it was time to add the eye. A stripe of black paper around the top that was about 2 1/2 inches big. I used a silver mason jar rim as the goggle. Then we put a circle piece of clear window sheets (from Stampin' Up). Punched a white circle that would fit the eye goggle and that was the back of the eye, followed by a black pupil and a purple half circle for the eyelid.
Last it was time to make the mouth. Using a craft knife, we cut the half circle for the mouth and then used white paper and cut out crooked teeth and glued those on.
Done! Ready to fill with many treats!
Olaf: Samantha basically made this on her own. After I covered the box, she used white cardstock to cut out pieces of Olaf's body. Black paper for the buttons and mouth. Brown paper for the stick arms, eyebrows, and crazy hair on top. She used a sharpie to draw on the face and a piece of orange paper for the carrot nose. After the face was drawn on, her Daddy cut out the mouth spot so that her Valentines would make it safely into the box. She put a square piece of paper into the mouth and glued it to the inside of the box, only on the top edge. This was to make sure the mouth was dark. She did an amazing job on it.
Making the boxes...
It was pretty simple to make the boxes. We just used an empty 12 can soda box. We put packing tape over the openings (the one to carry the box & also the corner one where the soda comes out) so the box would be flat and easier to cover with paper. It took about 4 sheets of 8 1/2 x 11 inch papers to cover the box & they overlapped on the sides. We just used hot glue to hold the paper onto the box because it would dry quickly and hold strong. Once the boxes were covered, we were ready to embellish them.
Embellishing the boxes...
For the Purple Minion, we started by covering the bottom with some black to make the overalls. Two one-inch strips were put in the front and around to the back for the straps of the overalls. Next we moved to the top of the Minion. I cut strips of paper 3/4 to 1 inch wide, from 3 different shades of purple. Then we crimped the strips quickly and randomly by hand and covered the top of the box with the folded strips to make the Minions crazy hair.
Next it was time to add the eye. A stripe of black paper around the top that was about 2 1/2 inches big. I used a silver mason jar rim as the goggle. Then we put a circle piece of clear window sheets (from Stampin' Up). Punched a white circle that would fit the eye goggle and that was the back of the eye, followed by a black pupil and a purple half circle for the eyelid.
Last it was time to make the mouth. Using a craft knife, we cut the half circle for the mouth and then used white paper and cut out crooked teeth and glued those on.
Done! Ready to fill with many treats!
Olaf: Samantha basically made this on her own. After I covered the box, she used white cardstock to cut out pieces of Olaf's body. Black paper for the buttons and mouth. Brown paper for the stick arms, eyebrows, and crazy hair on top. She used a sharpie to draw on the face and a piece of orange paper for the carrot nose. After the face was drawn on, her Daddy cut out the mouth spot so that her Valentines would make it safely into the box. She put a square piece of paper into the mouth and glued it to the inside of the box, only on the top edge. This was to make sure the mouth was dark. She did an amazing job on it.
Labels:
Art,
Paper Crafts,
School,
Stampin Up,
Valentines
Monday, December 2, 2013
Candy Bowl
Check out this cute candy dish that I made years ago.
You need 6 things.
First I spray painted them white. Let the paint dry.
Then used masking tape and put stripes on the pot and taped off the tapered edge of the lid. And painted them red, plus paint the wooden ball red as well.
Once everything has dried, use the E-6000 glue to attach the ball to the bottom of the lid and to attach the Ivy Glass Jar to the bottom of the pot.
Cut a circle of felt that will fit into the bottom of the ivy glass jar so that it covers up the glue and the bottom of the pot. You can glue this in, or just put it down there. Voila! Done! Fill with candy and set it on the counter or give as a gift.
This can be made in various sizes... If you have a larger glass jar that you want to use, take it to the store, find a terra cotta pot that will fit and a saucer that will work as a lid. Then proceed as normal. You can also vary the way you paint them. Endless possibilities.
You need 6 things.
- A Terra Cotta Pot
- A Terra Cotta Lid
- A Glass Ivy Jar (dollar store or craft stores)
- Wooden Ball with a flat side
- Spray Paint
- E-6000 Glue
- Felt, Circle
First I spray painted them white. Let the paint dry.
Then used masking tape and put stripes on the pot and taped off the tapered edge of the lid. And painted them red, plus paint the wooden ball red as well.
Once everything has dried, use the E-6000 glue to attach the ball to the bottom of the lid and to attach the Ivy Glass Jar to the bottom of the pot.
Cut a circle of felt that will fit into the bottom of the ivy glass jar so that it covers up the glue and the bottom of the pot. You can glue this in, or just put it down there. Voila! Done! Fill with candy and set it on the counter or give as a gift.
This can be made in various sizes... If you have a larger glass jar that you want to use, take it to the store, find a terra cotta pot that will fit and a saucer that will work as a lid. Then proceed as normal. You can also vary the way you paint them. Endless possibilities.
Labels:
Candy,
Christmas,
Decorating,
Felt,
Gift,
Jar,
Valentines
Sunday, September 4, 2011
Zucchini Carrot Bars
{{Zucchini Carrot Hearts with Lemon Cream Cheese Frosting}}
(printer friendly version)
2 eggs, slightly beaten
3/4 cup brown sugar, packed
1/2 cup canola oil
1/4 cup honey
1 teaspoon vanilla
1 1/2 cup shredded carrots
1 cup shredded zucchini, with peels on
1/2 cup chopped walnuts
1 1/2 cups whole wheat flour
1 1/2 teaspoon baking powder
1/2 teaspoon ground ginger
1/2 teaspoon cinnamon
1/4 teaspoon baking soda
{Lemon Cream Cheese Frosting}
1 (8 oz) pkg reduced fat cream cheese, softened
1 cup powdered sugar, sifted to remove lumps
1 1/2 tsp lemon zest
Preheat oven to 350 degrees F. In a large bowl, whisk together the eggs, brown sugar, oil, honey, and vanilla. (Cooking Tip: Measure the oil in a 1/4 measuring cup, then using the same cup measure the honey... it will just fall right out of the cup, nothing will stick to the inside of the cup). Set aside. Shred the carrots and zucchini (peels on add more color and texture, but you can take them off too!) and chop the walnuts. Then fold the carrot, zucchini, and walnuts in the egg and sugar mixture.
In a separate bowl combine the flour, baking powder, ginger, cinnamon, and baking soda. Whisk to blend together.
Mix the wet and dry ingredients together and stir just until combined. Spread batter into a parchment paper lined 13x9x2-inch baking pan.
Bake about 25 minutes or until a toothpick inserted in center comes out clean. Cool completely in pan on a wire rack.
Once the cake is cooled, pull the cake out of the pan by pulling up on the edges of the parchment paper. Using a cookie cutter, cut out the shapes and place on a wire rack over a cookie sheet.
Prepare the frosting. In a small microwave safe bowl, soften the cream cheese by heating on high for about 30 seconds. You don't want the cream cheese melted, but you want it really soft. In a medium sized mixing bowl, beat the cream cheese, sifted powdered sugar and lemon zest with an electric mixer on medium speed. Frosting will be soft. Put frosting into a piping bag with a small circle tip (or ziploc bag and snip a tiny hole in the corner) and pipe frosting over the cooled bars in a zig zag pattern.
**Simplified version.... Just cut the bars into squares and pipe (or spread) the frosting on them.


Store them in the refrigerator until ready to serve. Enjoy! Healthy and delicious! Perfect!
Labels:
Cake,
Cooking Tips,
Cream Cheese,
Valentines,
Vegetables
Thursday, August 18, 2011
Oreo Truffles
Yummy sweet chocolates that make a great gift, holiday treat, or just a sweet indulgence.
Start with a 16.6 ounce package of regular Oreos, (not double stuf). I like to open up about 10 cookies and take the one side without cream and put them into a ziplock bag. Then using a rolling pin or can of food, crush the cookies into a fine crumb powder. Set the bag of crumbs aside.
Put the rest of the cookies, including the cream, into a food processor and pulse until the cookies turn into a fine crumb.
When the cookies are crushed, dump the crumbs into a bowl with the softened 8 ounce package of cream cheese. Using the back of a spoon, mix the cookie crumbs & cream cheese into a soft dough. The dough will look wet, but you should be able to shape it.
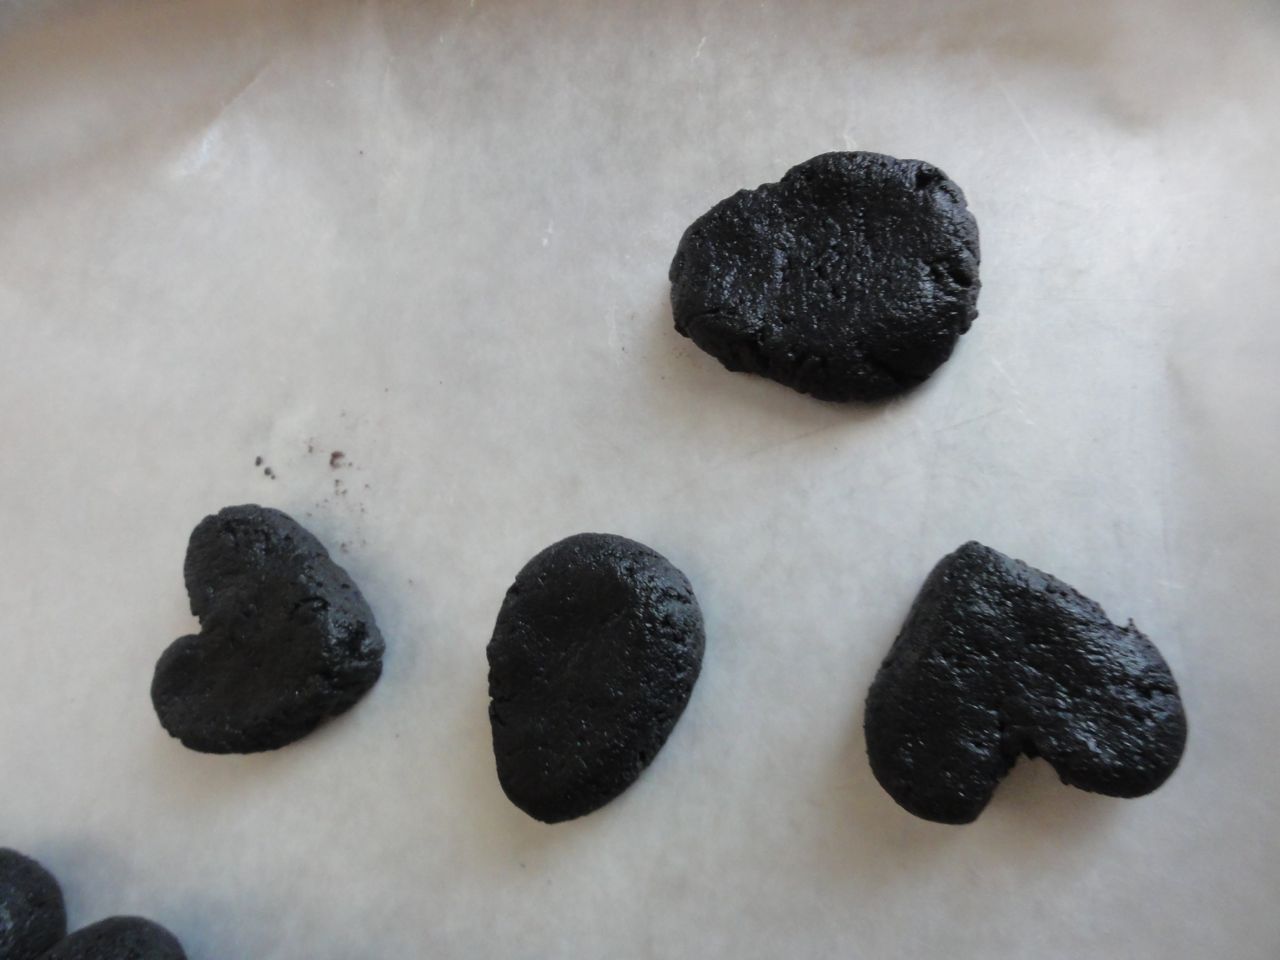
Cover a baking sheet with parchment paper or waxed paper. Take about a tablespoon of dough and roll it a ball....
...or an egg, or a heart, or a square, or whatever shape might fit the holiday or reason that you are celebrating. Refrigerate the balls for at least an hour. The truffles will have a nicer coat of chocolate if the dough is cold and hardened.
Melt some chocolate (tips for melting chocolate below)... either white or milk or semi-sweet chocolate. Place a chilled ball of dough into the chocolate and using two forks cover the ball with chocolate. Once the ball is coated, pull it out with the forks and let the excess chocolate drip off the fork. Drop the covered truffle back down onto the waxed or parchment paper. Then you can embellish them in a few different ways.
Let the chocolate harden either by letting them sit out at room temperature or stick them into the refrigerator.
Once they have set, you can serve them up on a plate, or package them up in a bag embellished with a ribbon.
{{Oreo Truffles}}
(printer friendly version)
1 pkg. (8 oz.) Cream Cheese, softened
MIX cream cheese and cookie crumbs (about 4 cups) until well blended.
SHAPE into 48 (1-inch) balls. Dip in melted chocolate; place on waxed paper-covered baking sheet. Sprinkle with remaining cookie crumbs.
REFRIGERATE 1 hour or until firm. Store in tightly covered container in refrigerator.
How to Easily Dip Truffles:
Start with a 16.6 ounce package of regular Oreos, (not double stuf). I like to open up about 10 cookies and take the one side without cream and put them into a ziplock bag. Then using a rolling pin or can of food, crush the cookies into a fine crumb powder. Set the bag of crumbs aside.
Put the rest of the cookies, including the cream, into a food processor and pulse until the cookies turn into a fine crumb.
When the cookies are crushed, dump the crumbs into a bowl with the softened 8 ounce package of cream cheese. Using the back of a spoon, mix the cookie crumbs & cream cheese into a soft dough. The dough will look wet, but you should be able to shape it.
Cover a baking sheet with parchment paper or waxed paper. Take about a tablespoon of dough and roll it a ball....
...or an egg, or a heart, or a square, or whatever shape might fit the holiday or reason that you are celebrating. Refrigerate the balls for at least an hour. The truffles will have a nicer coat of chocolate if the dough is cold and hardened.
Melt some chocolate (tips for melting chocolate below)... either white or milk or semi-sweet chocolate. Place a chilled ball of dough into the chocolate and using two forks cover the ball with chocolate. Once the ball is coated, pull it out with the forks and let the excess chocolate drip off the fork. Drop the covered truffle back down onto the waxed or parchment paper. Then you can embellish them in a few different ways. - Take the first set of cookie crumbs that are in the ziploc bag and sprinkle a few crumbs on the wet chocolate.
- Drizzle an opposing color of chocolate onto the truffle: white on brown or brown on white.
- Leave the truffle plain, and drop some extra chocolate on top. While the chocolate is still wet, use the fork and swirl the chocolate on top as a design.
- Or just leave them plain.
Let the chocolate harden either by letting them sit out at room temperature or stick them into the refrigerator. Once they have set, you can serve them up on a plate, or package them up in a bag embellished with a ribbon.
{{Oreo Truffles}} (printer friendly version)
1 pkg. (8 oz.) Cream Cheese, softened
1 pkg. (16.6 oz.) OREO Cookies, finely crushed
2 pkg. (8 squares each) Semi-Sweet Chocolate, melted
MIX cream cheese and cookie crumbs (about 4 cups) until well blended.
SHAPE into 48 (1-inch) balls. Dip in melted chocolate; place on waxed paper-covered baking sheet. Sprinkle with remaining cookie crumbs.
REFRIGERATE 1 hour or until firm. Store in tightly covered container in refrigerator.
How to Melt Chocolate:
Place unwrapped chocolate squares in microwaveable bowl. Microwave on HIGH 2-1/2 min. or until chocolate is completely melted, stirring every 30 sec.
How to Easily Dip Truffles:
To easily coat truffles with the melted chocolate, add truffles, in batches, to bowl of melted chocolate. Use 2 forks to roll truffles in chocolate until evenly coated. Remove truffles with forks, letting excess chocolate drip back into bowl. Place truffles on prepared baking sheet; let stand until firm.
How to Store:
Store in tightly covered container in refrigerator.
Monday, April 27, 2009
Ribbon Wreath

A fun ribbon wreath that is quick and easy to make. Great way to use up ribbon.
Click here for the link to the instructions to make one of these.
Basically you will start with a foam wreath form and many strips of ribbon. You can do a mono-color wreath like pictured here or you can do many colors of ribbons. Basically you will tie the ribbon onto the wreath form using a square knot (right over left, left over right). The square knot will keep the ribbon from unraveling. As you go around try to keep all the knots in a row on the front. Let the edges hang freely. The longer the ribbon, the more they will hang. If you use shorter ribbon, obviously it will produce a less full wreath. My ribbons all measured about 8-10 inches each, and I probably used about 100 ribbons.
Have fun tying all your ribbon.... If you have several coordinating ribbons, it would be a great way to use up some of your ribbon stash.
Think... red, green & white for Christmas.
Red, white and pink for Valentines day.
Black, purple, orange, and green for Halloween.
Orange, brown, tan, etc, for Thanksgiving.
Add in some rafia or some colored tulle.
There are so many possibilities... Have fun making some decor for your door!
Labels:
Christmas,
Decorating,
Halloween,
Home Decor,
Ribbon,
Thanksgiving,
Valentines,
Wreath
Monday, February 2, 2009
Heart Wreath

Needed something for my front door to decorate for Valentines Day. Found this cute tutorial on how to make this heart wreath! Loved it. First I bought a styrofoam heart using my 40% off coupon at JoAnn's so it was only like $2. I used about one yard of red fabric that I found on the clearance rack at JoAnn's (for $3), cut all the fabric into 2 inch squares.
Then using the tip of a pencil I wrapped the square of fabric around the pencil, dipped the tip into white glue and then pushed it into the styrofoam. Added some ribbon to the top! Voila! Adorable new decoration that only took a few hours.
Subscribe to:
Posts (Atom)