Showing posts with label Beverage. Show all posts

Wednesday, March 19, 2014

Orange You Glad... Birthday Gift

I made this little gift to give away... I've seen tons of variations on Pinterest. I had to mail this gift so I opted for less chocolate and more mailable items.

Super easy and versatile gift that can be made to fit any person. Basically you just have to collect "orange" colored items.

Here's some orange suggestions:
  • Orange notebook 
  • Orange pen
  • Orange tube of Mini M&M's
  • Trident gum (Tropical Flavor- with an orange package)
  • Orange Crystal Light
  • Burt Bees Chapstick
  • Orange Nail Polish
  • Orange Slices Candy
  • Reese's Peanut Butter Cups or Reese's Pieces
  • Kit Kat Candy
  • Soda/Drinks (Orange Crush)
  • Orange Tic Tacs
  • Goldfish
  • Cheetos
  • An actual real orange
  • Orange cup
  • Orange Ribbon
  • Orange Stickers
  • Anything Orange! Walk around and see what Orange things you find.
Then you add a little tag and it's done! Ta dah!

Here's a free printable of the orange tag for a Birthday gift.


And another tag for other gifts... Teacher Gift, Visiting Teacher gift, neighbor gift, just because gift! You can make the gift big or small depending on how much stuff you put into the collection.
 Right click on the image that you want and save it to your computer, then you can print out, cut out and attach it to your gift.

Here's another idea...


It's a plastic mason jar straw cup with a lid (and it even has an orange on the glass itself). I filled it up with a bunch of Orange candy, gum, Tic Tac's & Burt Bee's chapstick. I bought the cup at Wal-mart and after filling it with the orange treasures, I wrapped a ribbon and attached the tag.

Monday, March 17, 2014

St Patrick's Day Fun

Love this fun Green Day!

It started this morning with the kids running around to see what our naughty little Leprechaun did to the house.  For some reason he likes to snag a shoe from each child in the house and fill it with some treats or gifts. This year they got golden rolos and skittles, plus a fun new pair of glasses. Sammie & Anthony got the cool aviators while Jared's has an orange mustache attached to his green glasses and Morgan got the 80s Shamrock shades.

A few little tricks that silly little guy worked on while we were all soundly sleeping...
  • He colored the toilet water green and unrolled the toilet paper a bit. 
  • He arranged the kid's alphabet magnets into the word lucky and then sprinkled some rolos around there too.
  • The kitchen chairs were left in complete disarray...turned over and on top of each other.
  • Some of the family pictures had funny faces and mustache's drawn onto the photo.
  • Finally the milk was turned green. 
Silly little mischievous leprechaun. 


After the tricks were found it was time to eat some breakfast. We went simple this year.... LUCKY CHARMS... cuz "They're magically delicious!" Served along with the leprechaun tinted green milk.

Plus to add some fruits and veggies into their breakfast we had some Turtle Juice Smoothies. 

{{Turtle Juice Smoothie}}

(Printer Friendly Version... click here)

2 frozen bananas
1 big handful of fresh spinach
1 yogurt (flavor of your choice)
2 cups fresh or frozen fruit (strawberries, blueberries, one apple, can of pineapple, one orange, raspberries, etc.)
2 cups juice, any kind
1 cup water
1 tsp vanilla
Blend all ingredients in a blender.
Will be different every time depending on the fruit chosen.

Pina Colada = pineapple juice, pineapple, banana, spinach and pina colada yogurt.
Blueberry Monster = blueberries, banana, spinach, vanilla yogurt, any juice.
This recipe was originally created by my friend Gina Smith and we use it all the time. We vary the fruit and juice to alter the flavor a little, but there is always a BIG ole handful of spinach added to the blender. When I first started making this the kids had no idea they were eating so much spinach, then they saw me doing it and at first they wanted to be abhorred... until I mentioned to them that they'd been eating it for quite some time. They paused... and realized it was true and they don't even complain anymore... they even pull out the spinach leaves when we go to make our green smoothies.

While the kids were happily munching on their cereal and smoothies... I was getting their green lunches ready. I made them a PB&J Shamrock sandwich, a green squeezie applesauce, a green Sprite, a green Fruit by the Foot, a green apple, green Sour Cream & Onion chips (the bag was green at least), and for dessert some Thin Mint cookies. They were super excited about the lunch since they got things that they don't normally get to have. FUN! That's what the holidays are all about. I also went here and printed out a lunch box tag to put in their lunch too.


After lunches were packed, and teeth were brushed... we stopped to take some pictures of their green-ness before they left. Sammie had a green strip of hair that we clipped into her hair and a green scarf. Jared brushed his hair up into a faux-hauk and then I sprayed it with temporary green hair color that we picked up on clearance after Halloween.

Then they were off to school!

When school was over and they busted through the door... they were welcomed by this lovely little rainbow snack. I've seen a bunch of variations and basically just pulled together what I thought my kids would enjoy the most.

Red= Strawberries (or could use raspberries, watermelon, cherries)
Orange= Mandarin Orange slices (or fresh clementines/orange slices, cantaloupe, )
Yellow= Pineapple Chunks (almost did bananas but the pineapple was more yellow)
Green= Green Apples (or kiwi, green grapes, honeydew,)
Blue= Blueberries
Purple= Purple Grapes


I gathered up the rolos that had been scattered everywhere by the leprechaun and used those to create my gold at the end of the rainbow. The puffy white cloud at the other end of the rainbow is a creamy fruit dip that growing up we affectionately called Angel Dip. It is a very popular dip and SUPER easy to make. Only 2 ingredients needed. ***If you've never made this before... you really need to. You don't know it, but something has been missing from your life... and it is this dip. You can mix things into the dip to turn it into different fun flavors, etc, but in its original form, it's a CLASSIC!

{{Angel Dip}}

(Printer friendly version... click here)

1 8-oz pkg. cream cheese, softened (nonfat works great)
1 7-oz jar marshmallow crème
Using an electric mixer or food processor, blend ingredients until mixed thoroughly. Refrigerate. Serve with fresh fruit, such as strawberries, cantaloupe, grapes, watermelon, etc.


For dinner we always have a corned beef roast & vegetables. I pick up the corned beef at the grocery store or Cost-co and the directions for cooking them are right on the package. It has a yummy flavor that is different than a typical steak. This year I threw everything into my crock pot.


  1. First there is a layer of cut up celery, carrots, onions (and you can add potatoes, but I didn't this year).
  2. Then I put wedges of cabbage on top of the veggies. (Best to keep the cabbage out and add it in half way through cooking though so it doesn't get too soft.)
  3. Next comes the roast and I sprinkled a few of the celery, onions, & carrots on top of the roast.
  4. The corned beef comes with a little package of pickling spices that you will want to save and then sprinkle over the top of the roast and veggies.
  5. I made 2 cups of beef broth and poured that into the bottom of the crock pot.
  6. Cooked everything on high for 4 hours and then when we pulled everything out it was perfect. We sliced up the meat against the grain, added some of the veggies to the plate with a pile of rice (you can spoon the broth over the rice if you want, or thicken it up for a gravy).
You can't go wrong with a slow cooker meal, especially one that is easy and turns out great. Click here for the full recipe.


Along with dinner we had some green leprechaun juice. My 11 year old daughter Sammie adorned our glasses with a cute little dry erase marker mustache. She loves to set the table for holidays... she pulls out tablecloths and place mats and tries to make things match and look cute. (So proud of my little Sammie!)
For this juice, I just kinda improvised with what I had.

{{Leprechaun Juice}}

1 frozen can of limeade concentrate
1 frozen can of lemonade concentrate 
2 liter of Sprite
Green food coloring

Mix it all together and serve. 

Finally it was time for dessert... It's so hard to pick just one... So I picked two. (Even that was difficult... there are so many fun things to make for each holiday.) Here's what I made... one thing new and the other was tried and true... an oldie but goodie!

The first treat I tried today was the Lucky Charm treats. Basically a rice crispie treat but instead of using rice crispies, I used the lucky charms cereal. I thought they might taste extra sweet since the cereal has a coating of sugar on it, but it tasted like cheerios covered in marshmallows. Fun! My baby couldn't wait to get his little hands on them!


Finally... the oldie but goodie. Mint Brownies. And since there is a certain someone in my house that doesn't like mint in, there was a third of the brownies that didn't include the mint frosting... just the chocolate... And those kind are good too! If you want the recipe for these brownies... click here.

Oh yeah... one more thing. I thought I had mint extract in my pantry and while I was making the frosting I couldn't find any minty extracts anywhere. They were all gone! I was committed to these brownies... the kids were depending on them... I'd already told them that they'd be having them. So in order to prevent a coup I did something I have never done before. I had a small vial of doTERRA Peppermint Essential Oil and I added in 3 drops of the oil to the frosting so they would be mint and it worked! I had heard that people cooked with the oils and so I tried it. I didn't want to run to the store for the extract. I should have started with 2 cause it seemed a little bit strong to me, but the kids didn't complain or even notice a difference. They were asking for more.


Another St. Patrick's day... done and over with. It was a busy but a fun day.  Now we get to start planning Easter! 

Monday, November 11, 2013

Homemade Vanilla Sugar


What happens when you take two yummy things and put them together? You get something even better. Today we mixed together white granulated sugar and vanilla beans and made Vanilla Sugar! It takes ordinary sugar to extraordinary! Vanilla sugar, when used alone, adds a subtle flavor. It can also be used to replace vanilla extract in a recipe (1 tbsp. vanilla sugar=1/4 tsp. vanilla extract), or can be used in addition to the extract to add more flavor & dimension to your baked goods.


There are TONS of different types of vanilla beans out there. I've seen counts of over 200 vanilla bean varieties... say what!? That's crazy! Some popular bean varieties include Madagascar, Tongan, Tahitian, Mexican, Indian, Indonesian, Bourbon, etc and they all have varying flavor. I've used the Madagascar Bourbon vanilla beans- because during my research I learned they were the best for making vanilla extracts and sugars. (I do want to try the Tahitian and Mexican next though.) The flavor of this Madagascar bean is great for cooking with (whether you make an extract--post to come soon, or if you make the vanilla sugar).  Once you start looking online you might be overwhelmed at all the varieties of vanilla beans. One word of caution.... DON'T buy them at the grocery store. They come in a small bottle and it costs like $12 for only 1, maybe 2 beans. Ridiculous! The best way to buy your beans is to get them online. I've bought them here at Olive Nation. They have free shipping on all vanilla bean orders. The more you buy, the better the deal is. I've ordered from here several times, and they were great quality beans when I received them I was able to make a bunch of different things. Plus they can be stored for future use.

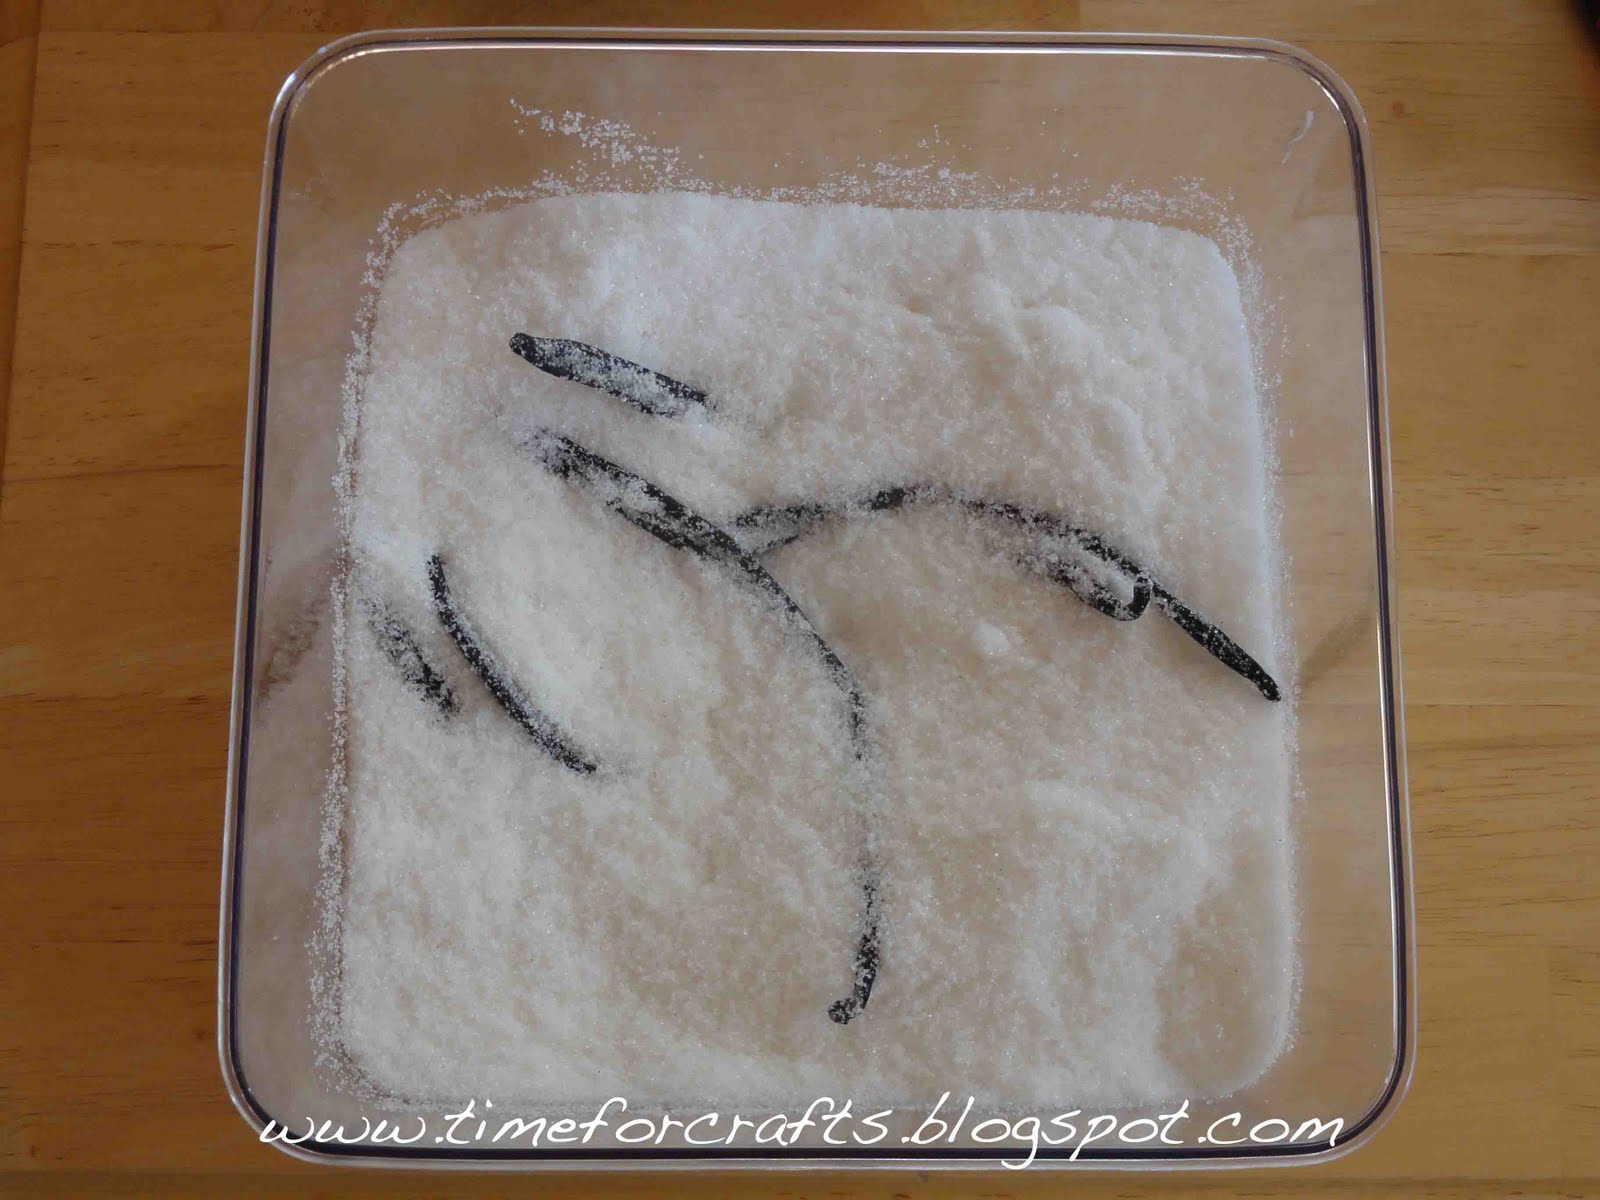
The beans aren't very attractive, but as soon as you open the package, the sweet aroma of creamy vanilla will fill the room. Here is one thing that you can do with the vanilla beans... make vanilla sugar. It's simple and will only take 5 minutes.

In order to make the vanilla sugar, you need 2 ingredients. Sugar & vanilla beans.

That's it! And 1 to 2 weeks later, you can start using the sugar that has been infused with the flavor of the vanilla beans.

There is so much flavor in a single vanilla bean that you can continue to add fresh sugar to the container with the bean and it will continue to make more and more vanilla sugar. You can do this for about 6 months. Awesome!

How to Cut A Vanilla Bean: Lay the bean flat on wax paper (so you don't lose any precious seeds) on a cutting surface. Carefully cut at the center, then cut toward each end. Once the bean is split open, scrape the tiny seeds out with the blade of the knife or the tip of a spoon. (By cutting the bean open before placing it in the sugar, more surfaces of the bean is exposed, intensifying the flavoring properties.) 


{{Vanilla Sugar}}

(printer friendly version click here)

1 vanilla bean, whole or scraped
2 cups granulated sugar (can also use confectioners' sugar)

First rinse off the vanilla bean with water and pat it dry. Then take the whole vanilla bean and slice down the side of bean with the back of a knife (or a spoon) and scrape out the black gooey seeds. Stir the seeds into the sugar that is in an airtight container. Bury the bean in the sugar as well and seal tightly with lid. Let sit for 1 to 2 weeks. Use in place of any recipe that calls for regular, granulated sugar. More sugar can be added to the same beans for up to 6 months and the bean will continue to flavor the sugar.


Suggested ways to use the Vanilla Sugar: (possibilities are endless)
  • Sprinkle it directly on cookies, muffins, cereal, oatmeal, tea, coffee, hot chocolate, and other beverages.
  • Kettle Corn Popcorn
  • Put the sugar in a cute air tight container, add a ribbon & give as a gift! Add it to a gift basket of other goodies that the sugar can be used with. 
  • Baking--
    • Snickerdoodles & SuperDoodles
    • Sugar Cookies
    • Cakes (especially white cakes)
    • Fruit Desserts
    • Puddings 

Friday, August 26, 2011

Frozen Butterbeer Drink

Harry Potter... we love Harry Potter! The last movie just came out and while we haven't seen it yet, we are excited to have the chance.

To celebrate... I found some recipes for Butterbeer, that delicious drink they always drink in the book. When they created "The Wizarding World of Harry Potter" in Universal Studios, I was ready to go as soon as it opened. I was so bummed when I found out it was in Florida and not California. If it had been over in Hollywood, I would have been there either on opening day or soon thereafter, but being that it is in Orlando created a bit more of a problem. Oh well... I will go one of these days.

I've heard that at the amusement park they serve Butterbeer... Mmmmm.. Two kinds of Butterbeer... one frozen, and the other not frozen. I found two recipes, modified them a bit so they are non-alcoholic and we tried them both.

Here is the first recipe... It is a warmer version of butterbeer....


{{Warm Butterbeer}}


(printer friendly version)

It warms you up and tastes great! From the Three Broomsticks!

1 cup (8 oz) cream soda (or club soda)
1/2 cup (4 oz) butterscotch syrup (ice cream topping)
1/2 tablespoon butter

Step 1: Measure butterscotch and butter into a 2 cup (16 oz) glass. Microwave on high for 60 to 90 seconds, or until syrup is bubbly and butter is completely incorporated.

Step 2: Stir and cool for 30 seconds, then slowly mix in cream soda. Mixture will fizz quite a bit.

Step 3: Serve in two mugs or small glasses.

A Perfectly Warm Hogwarts Treat for Two!


Here's the second recipe.... The Frozen Butterbeer recipe... this was by far our favorite. We liked this one the best! So if you are only going to try one... try this one first!


{{Frozen Butterbeer}}

(printer friendly version)

For the Butterbeer:
1 1/2 cups cream soda (we used IBC cream soda)
6 tablespoons butterscotch syrup (ice cream topping)
2 cups ice

For the foamy topping:
6 tablespoons heavy cream
1 tablespoon powdered sugar
1 tablespoon butterscotch syrup
1/2 teaspoon vanilla extract

Combine cream soda, syrup, and ice in a blender and blend until it is slushy.

Pour into a glass or mug.

In a small bowl, combine heavy cream, powdered sugar, syrup and vanilla. Using an electric mixer, whisk together until almost whipped. You want the cream mixture to be slightly loose, not as stiff as whipped cream. Top the frozen Butterbeer with the foamy topping and serve immediately.

Serves 2.

Possible change for our second attempt at this... (but it will require more planning to make it). I think if we freeze the cream soda in ice cube trays and then replace them with the regular ice cubes, it will help the drink from becoming watered down as it melts in the mug.

If you don't let it sit in your glass for very long, then this won't be an issue, but extra flavor is always a plus!


Sunday, August 7, 2011

Watermelon Lemonade Slushies


This is a yummy treat that everyone in my house enjoys from the Daddy to the Mommy all the way down to the little babies. It is such a refreshing drink that is super easy to make. It only requires a small amount of preparation.
On a hot summer day, while you are slicing up one of those HUGE watermelons to eat, just set aside some of the watermelon and dice it into cubes and put it into a large ziploc freezer bag. Freeze the watermelon and then at any time you can be ready to make this delicious beverage. The watermelon and lemonade are very complimentary to each other and has a refreshing flavor.


{{Watermelon Lemonade Slushy}}

(printer friendly version)

4 cups frozen cubes of watermelon

2 cups water

1/2 cup Country Time Lemonade (or 1 pkg of Crystal Light Lemonade for 2 quarts)

Place all ingredients into a blender. Blend on high until smooth. Makes about 4 glasses.


Saturday, June 6, 2009

Banana Smoothie

In a blender combine:
2 1/2 cups ice
1 cup milk
1 banana
1 T. sugar or splenda (optional)

Blend all ingredients until smooth, then pour into a glass and serve immediately. Very light and refreshing banana smoothie.

LinkWithin

Related Posts Plugin for WordPress, Blogger...