Showing posts with label Cooking Tips. Show all posts

Thursday, November 21, 2013

How to Brine (& Roast) a Turkey -- with things you already have in your home!

Can you believe it's going to be Thanksgiving next week. I was realizing how close we are to Thanksgiving and that we should talk about the amazing results are of a turkey that has been soaked in a brine. I typically use a very simple salt and sugar brine. I've seen some pretty interesting combinations of stuff put into the brine solution.

Let's start at the very beginning. A very good place to start. The turkey. I've read that it is best to only brine a fresh turkey (one that has never been frozen) because the kind that have been frozen tend to have a salt solution injected into them to help preserve juiciness. I've brined a frozen turkey using this method and never had an issue with the meat being too salty. I always make sure to rinse it well and it has always turned out well.

The first time I ever attempted to brine a turkey, which was about 7 or 8 years ago, I didn't have the brining bags. I have used a variety of methods to soak the turkey in a brine and find that two clean trash bags work wonderfully if you don't have a brining bag on hand (like this one pictured from Williams Sonoma). They sell a set of 4 bags for $17.95. 2 small ones for a 5 lb chicken and 2 large ones that will hold up to a 23 pound turkey. And let me just say, once you start brining, you probably won't go back. It makes the breast of the turkey soooooo moist. Even the leftovers on the next day are still moist. It is A-MAAAAZING! But if you don't want to buy bags right away for your first time, then you can use a couple of regular tall kitchen trash bags.
 Brining Bags, Set of 4

Here's my cute little Tom turkey, in a bag and waiting for the brine to be added. It has been thawed (which was done in the refrigerator for at least 2-3 days prior to the day before Thanksgiving at no higher than 38 degrees Fahrenheit.), the innards were all removed, it has been rinsed, and then set into two large clean trash bags. For the brine I used a large 5 gallon jug or bucket and mixed all the stuff together. You can use a large pot or other container that will hold all the ingredients. 
 {{The first time I made a brine I didn't have a super large container for the brine so I just used a one gallon pitcher, added the sugar & salt, mixed it as well as I could, then put it into the trash bag, without the turkey, then added the rest of the water needed to cover the turkey. Then added the turkey. It worked wonderfully.}}

Some brines you have to cook and then wait for them to cool, but this one is simple. You take 2 cups of kosher salt (table salt will work too), 2 cups of white granulated sugar, and 2 1/2 gallons of cool water (not hot because you don't want to warm up your turkey and not cold because then the salt & sugar won't dissolve as easily). These are the ratios for a turkey that weighs about 12 -14 pounds and if your turkey is bigger then you will need a bit more water, salt and sugar. Keep it proportional... for every 1/2 gallon more of water add a 1/3 cup more salt and sugar. Stir the ingredients together.

It is important to keep your turkey cool while it brines. You don't want to just store it on the counter because it will get too warm. It needs to be kept cool. I can never store my turkey in the fridge during the holidays while it is brining because there is never enough room. I always have a bunch of pumpkin pies and other yummy holiday food crammed in there. You want to brine your turkey for about 4-6 hours minimum, but I usually start it at night before bed (10, 11 or midnight- depending on how much other stuff I still have to do before going to bed) and let it brine over night... for about 8-10 hours. 

You'll want to calculate backwards from when you want your turkey ready to serve. Here's an idea:
  1. Serve the Turkey at 1 PM.
  2. Remove Turkey at 12:30 to let it sit and rest for about 15-20 minutes before carving.
  3. A 12-16 pound turkey, that is unstuffed, will take about 2 1/2 - 3 hours to cook. 
  4. Between 9-10 AM you will want to have the bird in the oven. 
  5. 8:30 AM start dressing up the bird with whatever spices, butter, etc that you've chosen. 
  6. 8 AM pull the bird out of the brine, rinse, let it soak in water for 15 minutes, rinse again. 
  7. 11 PM the night before, start brining your bird, and it will be soaking for about 9 hours.

I've found a fantastic way to keep it cool and not take up space in the fridge. Use a cooler. First I layer some ice cubes in the bottom of the cooler, then I put my trash bags in the cooler, add the turkey, and add the brining liquid.

You'll want to remove the excess air so that the liquid is covering up the turkey and then seal up the bags. I used a small zip tie. It was effective and strong at keeping it closed, but you can use whatever you can find.

I noticed that my turkey would float to the top of the brining water and I wanted to keep it submerged. So after it was sealed up, we added a small bowl to the top so that when we close the lid on the cooler, it would push the turkey down fully into the liquid.

Finally we wanted to keep the turkey cool so we added ice cubes all around the turkey in his little salt bath. Closed the lid and came back 8 hours later and it was ready to start the roasting process.

This is a very important step. Rinse the turkey well. You want to get rid of any excess salt. Rinse the outside of the bird and use your hand to rub off salt. Make sure you rinse out the inside of the bird well as well. Then fill up the sink full of cold water and let your bird soak in the cold water bath for about 15 minutes. Then drain the water and rinse him again.

Pull the bird out of his bath and pat him dry with some paper towels. Let him rest on a clean dry towel to allow any excess water to drain out while you prepare your other ingredients for roasting.

Then he is ready for you to start roast. Everyone has a preferred method of roasting. Breast side up or down. High heat then low heat, only low heat, in a bag, or in a roaster. There are lots of ways. I've used multiple methods.

There's a simple Roasting method included here.

Start preheating your oven to 425 degrees. All you need is butter, some pepper and low sodium chicken broth. After the turkey has been rinsed let it sit and drain any excess water. Pat dry with paper towels. Mix 5 tablespoons of softened butter with 1/2 teaspoon of pepper. Rub this butter under the skin of the turkey, next to the turkey breast. Then take the 3 tablespoons of melted butter and brush that on the skin. The turkey is cold so it will solidify the butter. I sprinkled a little more pepper on top of the skin as well. (Then I stuffed some celery stalks, onion quarters and some carrots into the cavity of the bird. It wasn't stuffed full, just some vegetables to add some extra flavor.) Then in the bottom of your roasting pan, pour in the low sodium chicken broth to use for basting and to keep things from burning in the bottom of the pan.


Put the prepared turkey into the 425 degree Fahrenheit oven for 25 minutes. Baste and then rotate the roasting pan in the oven. Bake for an additional 25 minutes and then baste it again. Reduce the oven temperature to 325 degrees Fahrenheit. Continue to roast, baste and rotate the pan every 30-40 minutes. It will only need about an hour to an hour and half more (if it is about a 12 pound turkey). Keep cooking the turkey until the breast reaches an internal temperature of about 170 degrees and the thigh meat is 180 degrees. Pull out the turkey and let it sit for about 15-20 minutes before carving. 


{{Brining & Roasting A Turkey}}


Click here for printer friendly version

2 cups Coarse Kosher Salt
2 cups sugar
2 1/2 gallons cool water
1 (12 -14 pound) fresh, whole, bone-in skin-on turkey, rinsed and patted dry
5 tablespoons unsalted butter, softened
3 tablespoons unsalted butter, melted
1/2 teaspoon ground black pepper
1 cup low sodium chicken broth, wine or water
      
To Brine: Combine Kosher Salt and sugar in cool water in a large, clean stockpot or 5 gallon jug until completely dissolved. Place the whole turkey in the brine until completely submerged. Cover and refrigerate for 4 to 5 hours minimum (or cover with ice in a cooler) and up to 8-12 hours. Remove the turkey from the brine, rinse inside and out under cool running water for several minutes to remove all traces of salt. Fill up a sink of cold water and let the turkey sit in the water for about 15 minutes. Drain water, rinse inside and out again then pat dry with paper towels.


To Roast: Mix the softened butter with the pepper. Place turkey on rack in roasting pan. Rub the seasoned butter under the skin. Brush the skin with the melted butter. Pour the 1 cup liquid (wine, broth or water) over the pan bottom to prevent drippings from burning. Roast turkey at 450 degrees F for 25 minutes, baste and then rotate the roasting pan. Continue roasting until the skin turns golden brown, an additional 25 minutes; baste again. Reduce oven temperature to 325 degrees F; continue to roast, basting and rotating the pan once about halfway through cooking, until the *internal temperature reaches 170 degrees F for turkey breast meat and 180 degrees F for turkey thigh meat. Remove the turkey from the oven. Let stand 20 minutes before carving.

Happy Brining! Have a Happy Holiday!

Monday, November 11, 2013

Homemade Vanilla Sugar


What happens when you take two yummy things and put them together? You get something even better. Today we mixed together white granulated sugar and vanilla beans and made Vanilla Sugar! It takes ordinary sugar to extraordinary! Vanilla sugar, when used alone, adds a subtle flavor. It can also be used to replace vanilla extract in a recipe (1 tbsp. vanilla sugar=1/4 tsp. vanilla extract), or can be used in addition to the extract to add more flavor & dimension to your baked goods.


There are TONS of different types of vanilla beans out there. I've seen counts of over 200 vanilla bean varieties... say what!? That's crazy! Some popular bean varieties include Madagascar, Tongan, Tahitian, Mexican, Indian, Indonesian, Bourbon, etc and they all have varying flavor. I've used the Madagascar Bourbon vanilla beans- because during my research I learned they were the best for making vanilla extracts and sugars. (I do want to try the Tahitian and Mexican next though.) The flavor of this Madagascar bean is great for cooking with (whether you make an extract--post to come soon, or if you make the vanilla sugar).  Once you start looking online you might be overwhelmed at all the varieties of vanilla beans. One word of caution.... DON'T buy them at the grocery store. They come in a small bottle and it costs like $12 for only 1, maybe 2 beans. Ridiculous! The best way to buy your beans is to get them online. I've bought them here at Olive Nation. They have free shipping on all vanilla bean orders. The more you buy, the better the deal is. I've ordered from here several times, and they were great quality beans when I received them I was able to make a bunch of different things. Plus they can be stored for future use.

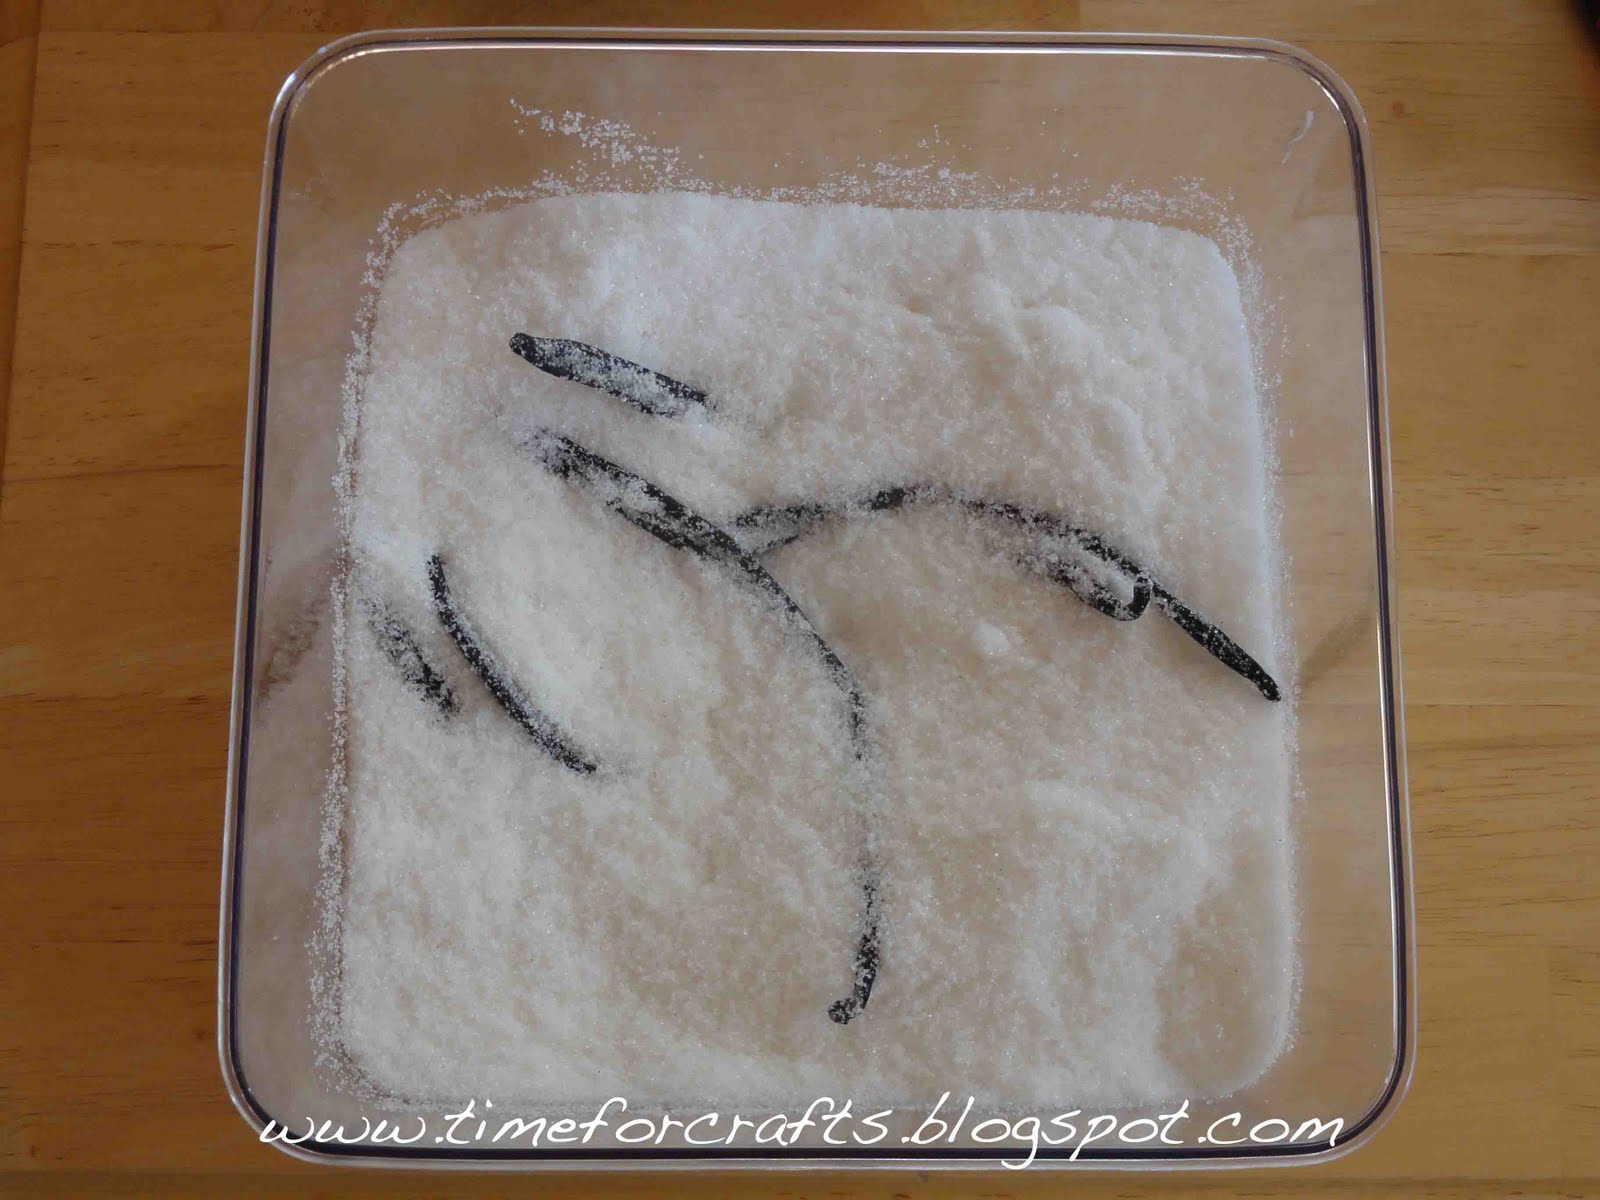
The beans aren't very attractive, but as soon as you open the package, the sweet aroma of creamy vanilla will fill the room. Here is one thing that you can do with the vanilla beans... make vanilla sugar. It's simple and will only take 5 minutes.

In order to make the vanilla sugar, you need 2 ingredients. Sugar & vanilla beans.

That's it! And 1 to 2 weeks later, you can start using the sugar that has been infused with the flavor of the vanilla beans.

There is so much flavor in a single vanilla bean that you can continue to add fresh sugar to the container with the bean and it will continue to make more and more vanilla sugar. You can do this for about 6 months. Awesome!

How to Cut A Vanilla Bean: Lay the bean flat on wax paper (so you don't lose any precious seeds) on a cutting surface. Carefully cut at the center, then cut toward each end. Once the bean is split open, scrape the tiny seeds out with the blade of the knife or the tip of a spoon. (By cutting the bean open before placing it in the sugar, more surfaces of the bean is exposed, intensifying the flavoring properties.) 


{{Vanilla Sugar}}

(printer friendly version click here)

1 vanilla bean, whole or scraped
2 cups granulated sugar (can also use confectioners' sugar)

First rinse off the vanilla bean with water and pat it dry. Then take the whole vanilla bean and slice down the side of bean with the back of a knife (or a spoon) and scrape out the black gooey seeds. Stir the seeds into the sugar that is in an airtight container. Bury the bean in the sugar as well and seal tightly with lid. Let sit for 1 to 2 weeks. Use in place of any recipe that calls for regular, granulated sugar. More sugar can be added to the same beans for up to 6 months and the bean will continue to flavor the sugar.


Suggested ways to use the Vanilla Sugar: (possibilities are endless)
  • Sprinkle it directly on cookies, muffins, cereal, oatmeal, tea, coffee, hot chocolate, and other beverages.
  • Kettle Corn Popcorn
  • Put the sugar in a cute air tight container, add a ribbon & give as a gift! Add it to a gift basket of other goodies that the sugar can be used with. 
  • Baking--
    • Snickerdoodles & SuperDoodles
    • Sugar Cookies
    • Cakes (especially white cakes)
    • Fruit Desserts
    • Puddings 

Monday, September 30, 2013

Edible Image on Cake

For my Grandpa's 80th Birthday we decided to celebrate with a birthday party. It's not every day that you turn 80. I was making a cake for the party and wanted to do something different. I had a picture of my Grandpa when he was younger and serving in the air force. He also worked his career and retired from Disney Studios. I took the picture, scanned it into Photoshop, added some balloons, a Mickey Mouse & some words. I took the picture to our local grocery store, Harmons and in their bakery section they printed the picture out on their edible printer (someday I want to get me one of these). On the left side you see the picture and the frosting edible image on the right. It is an 8x10 image.

You can tell the edible image is not as vivid as the printed picture and it ended up a bit smaller than the 8.5x11 inch image that was printed. 


However it is a great duplication... and went onto the cake nicely. (Check local grocery stores or bakeries for the option to have your image printed cause it makes for a super easy & personalized cake!)


Here is the cake right after I finished decorating. I made a simple chocolate layered cake, covered in a basic white buttercream (had to be a light color so the image would show up). Before I added the blue star border I peeled the image off the backer paper and applied it onto the white background. So easy! Peel & Stick! The edges were super noticeable at first but with time the image blended into the frosting more and more. I didn't really know what I was doing, but it turned out. When they printed the image, there was an ink blur at the bottom and it transferred as well... I should have cut that off. I could have trimmed around the image as well since the cake was bigger than the image and I didn't put the border next to the edge of the image.
I used a large wide open star in blue tinted buttercream for the border.


Grandpa (and Grandma) loved the cake! And that's all that matters. I had bought some camouflage material to use as a tablecloth for our party. The cake cut up nicely when it was time to eat it. I made sure I got a piece with the edible image and it tasted like sugar.

Happy Birthday Grandpa!

Tuesday, September 27, 2011

Olive Oil--What's the difference?

Extra Virgin olive oil versus light olive oil? What's the difference?

I don't know about you, but I've always wondered what the difference is between all the different olive oils. I thought I'd do some research.

Extra Virgin Olive Oil is the purest type of olive oil you can find. When the olive is pressed, oil comes out and if the olive was of the highest quality it will be pure olive oil, making extra virgin olive oil.

However, if the olives aren't good quality, then the oil that comes out of the pressed olive has to be refined further, which results in a lighter color. This starts the progression through the different types of olive oils and why the variation in the colors.


They are both healthy and have basically the same attributes since they are both derived from olives but the extra virgin olive oil contains a better color and flavor that is most suitable to dressings and the lighter olive oils are better suited for cooking at high heats.

So in synopsis.....
"Extra" means more money but a better quality. Always use this type for dressings.

"Light" means less money so you can save a little bit of money by using this type of olive oil to cook with.

Monday, September 26, 2011

Corn on the Cob Cooking Tips


With fall coming on in full swing... harvesting all those fruits and vegetables from the garden come as well. Plus fruit and vegetable stands are popping up everywhere with bountiful baskets of food to chose from.

Corn on the cob... a sure sign of fall.... Sometimes the ears aren't as sweet as we want them to be.

A surefire way to get the sweetest corn on the cob? Add some salt to the water when it is boiling. Well duh... I think everyone does that, but if you also add some sugar to your water, every cob of corn becomes even sweeter.

Fill a pot full of water and add the salt and sugar to the water. While the water comes to a boil, shuck the corn (remove the husks) and run them under cold water to remove any stubborn silk that wants to hold on. When the water is boiling, carefully add the cobs into the water. Cover the pot with a lid and let the corn boil for about 6-10 minutes (less if you want your corn more crunchy). Remove the corn from the boiling water with tongs and dress it up the way you like it best. I love rolling it in some butter and adding a small amount of salt and pepper.

Of course... there are other ways to cook corn on the cob. You can grill it, steam it or even microwave unshucked corn for 2-3 minutes.

Here's a recipe for tasty grilled corn on the cob:

{{Tasty BBQ Corn On The Cob}}

(printer friendly version)

1/2 cup butter, softened
cayenne pepper, to taste
garlic powder, to taste
1 teaspoon chilli powder
1/8 teaspoon dried oregano
1 pinch onion powder
salt & pepper to taste
6 ears corn, husked and cleaned

Preheat an outdoor grill to medium to high heat and lightly oil grate. In a medium bowl, combine cayenne pepper, garlic powder, chili powder, oregano, onion powder, salt and pepper. Add the softened butter and mix well. Apply this mixture to each ear of corn and then place each ear into a piece of aluminum foil, big enough to wrap up the corn. Wrap like a burrito and twist the ends to close. Grill over medium high heat for about 20 to 30 minutes, or until the corn is tender when poked with a fork.


Enjoy the end of season's bounty...

Also here is a yummy Fresh Corn Casserole... a great way to use up corn on the cob in a new way.

Sunday, September 18, 2011

Asian Salad

I start drooling again everytime I look at these pictures.... This salad is so yummy! This salad started from an idea from my fabulous friend and it is delicious! There are quite a few ingredients in this salad... understand, it is not hard to prepare, but it just takes some time to chop and prepare. It is a great salad to serve at a party too! You can put all of the fruits and vegetables and toppings into separate bowls and let everyone create a salad bar so that all the guests can create a salad to their liking. You can include as many or as few of the ingredients listed, but for the full taste and complexity of flavor, you kinda have to add all of the parts... at least once!

It is really yummy.... There is crunchy and sweet and salty flavors... it is fabulous! Let me say it again... I think you should try it at least once.

Here's a close up of the salad.... Mmmmmm.... Ready? Let's get to the ingredients...

Fresh spinach leaves, washed and dried...

Leafy romaine lettuce... Wash the lettuce first and let it drip dry. I should have taken pictures of a great way to cut up romaine lettuce in order to get nice bite size pieces.... let me try to explain it... Using your chef's knife, hold the lettuce at the base (on the left side). Starting at the base, slice up the leaves of the lettuce (parallel to the leaves... like if you are holding the lettuce like the picture, you would slice from left to right). Rotate the lettuce a half turn, and slice up again. Then starting at the top of the head of lettuce (on the right side of the picture) chop up the lettuce, until you have finished chopping the entire head and have reached the base.

To fully diversify the flavor of the salad.... use a nice crisp iceberg lettuce as well... all chopped up into bite size pieces.

Add green (not pictured) and red cabbage... prepared the same way.
First slice a chunk off of the main head of cabbage, and then thinly slice it using your chef's knife.
Finally, chunk the cabbage up into about one inch pieces.

Chopped celery... I like to chop off the celery directly from the bunch...

Then wash the chopped celery in a colander and let it dry before adding it to the salad.

Mmmm... Green onions... great flavor for any salad. Wash the green onions... dry them off.
Then chop them into small bits.

I like to put the spinach, leafy romaine lettuce, iceberg lettuce, red & green cabbage, celery, and green onions into one big salad bowl so that there are fewer sides. But you can put everything into individual bowls. Of course this will depend on how many bowls or how much room you have to lay it all out. All the colors together are wonderful when you put it in a bowl together.

These are things that I typically leave on the side...

Jicama... I love jicama (pronounced hick-uh-muh)! It is a watery, sweet, root vegetable with a tremendous crispy crunch. It is fabulous. You can find them at the grocery store in the produce section. You want to pick a firm, medium sized jicama that has dry roots. You don't want it to be soft or with wet spots because that is an indication of rot. It keeps very nicely in the refrigerator for up to two weeks. It is a great source of vitamin c and it is fat free. TIP: You can eat these jicama sticks along with your carrots and celery sticks. A GREAT SNACK!

First peel the jicama root with a peeler or with a knife.
Then slice it into 1/4 inch slices...
Turn it the other direction and slice it again... creating these long skinny sticks of wonderful jicama goodness. Put these into a bowl to be added to the salad when you are compiling your plate full of salad.

Bean sprouts... Buy them in bulk in the produce section. Wash them off and put into a bowl.

Fresh oranges, cut up.

First cut off the top and bottom of the orange. Take the peel off. (either pull off the peel or cut if off with a knife)Separate the slices, but leave them slightly together to make it easier to cut them. Slice them into small chunks and put into a bowl. A nice sharp serrated knife works really well for the oranges so they don't become mushy and they hold their shape.

I LOOOOOVE avocado and I think it always make a salad or a sandwich taste better and they are incredibly good for you! These are Hass avocados... To find a good avocado you want to feel it to make sure that is firm, but tender. I know it sounds like a contradictory thing, but you want it to be firm all over, with a slight soft feeling but not mushy. Sometimes at the grocery store you will find very firm avocados, but they will ripen up quickly on the counter (or you can put them into a brown paper bag).

Once you have found the perfect avocado, you take a knife and slice it around the middle of the avocado and then pull the two halves apart. Take the seed out by stabbing a knife into the seed and twisting it out.
Then slice the avocado into squares. Slice it up one direction and then again in the opposite direction so that it looks like this. (Sometimes I like to sprinkle salt and pepper on the avocado at this stage and eat it right out of the skin with a spoon!)
Using a spoon, scoop out this green goodness.
This avocado is a very soft and ripe avocado, so the squares are a little bit mushy, but it has great flavor. Put the avocado directly onto individual salads, or into a bowl for self-service. Okay... we are almost done... just hold on, it will be well worth the time it takes to cut everything up.

Crushed peanuts... Salty and crunchy... they add immense dimension to the salad. I use Dry Roasted Peanuts, lightly salted.
A great way to cut up peanuts is to turn your large chef's knife onto the side and press it down on top of the peanuts.
Move the knife around until all the peanuts have been crushed into pieces. If you need to, you can turn the knife to its sharp edge and finish chopping up any large pieces. Put these into a bowl with a spoon for serving.

A terrific crunchy piece of this salad are the crunchy won ton strips. Buy some won ton wrappers at the grocery store (found in the refrigerator section- normally by cheese and dairy type stuff). Pull out a stack of won ton wrappers and cut them into about half inch strips.
Heat up a small amount of oil in the bottom of skillet over medium heat. Fry a few of the won ton strips at a time. You'll have to do them in batches, depending on how big your pan is and how much oil you use. Keep them moving around so they don't get overdone.

After they turn a golden brown, transfer them to a paper towel to drain the oil off and if you want you can sprinkle a tiny amount fine sea salt on top of them. These will be the final piece of the salad puzzle, other than the dressings. (I know you are probably wondering if it will ever end. It will!)

Peanut Sauce... you can either buy a pre-made peanut sauce in the Asian section at the grocery store.... or make this yummy peanut sauce. My friend Gina gave me this recipe and it has become a staple in my recipe box... one that I will treasure forever! It has to be remembered! It is fantastic for pizza and dipping and salads and lettuce wraps and many more things. I like to make a batch and keep it in a bottle in my refrigerator so it is easily accessible. You can pour this dressing onto your salad cold or warm it up a bit.
{{Thai Peanut Sauce}}

(printer friendly version)


1/2 cup sugar

1/2 cups creamy peanut butter

6 tablespoons soy sauce

6 tablespoons water

4 tablespoons oil

2 teaspoons minced garlic

1/2 -1 teaspoon lime juice


Combine all the ingredients into a heavy saucepan and cook over medium to low heat until fully combined. About 10 minutes. Serve on salad cold or warm. Use as a dipping sauce for veggies. Use to top lettuce wraps. Use as the sauce for a Thai Chicken Pizza


Drizzle this delicious peanut sauce onto the salad.

Finally... the dressing. This is just a purchased dressing that is fantastic and has the perfect flavor for this salad. Kraft Light Asian Toasted Sesame dressing.

The only other thing that I didn't put on this salad, that you will see on the ingredient list is chicken. My husband likes to have protein in his dinners, so if I am making this for a family dinner dish, then I make sure to include chicken. I've used canned chicken, or I've marinated some chicken in the Asian Toasted Sesame dressing and then grilled or baked it, then you can slice it up and put it on the salad. I love it when the meat is slightly warmed up. I like having the contrast between the cool, crisp vegetables and then the warm yummy chicken.

{{Asian Salad}}

(printer friendly version)


Fresh Spinach leaves

Chopped up iceberg lettuce and romaine lettuce

Red Cabbage, thinly sliced

Green Cabbage, thinly sliced

Fresh oranges, peeled and cut up

Avocado, cut up

Green onions, chopped

Celery, chopped

Carrot, grated

Peanuts, crushed

Bean Sprouts

Jicama, thin strips

Cooked Chicken

Kraft Light Asian Toasted Sesame Dressing

Peanut Sauce (Pandkok KaDang… recommended type)… RECIPE for Gina’s Peanut Sauce (above)

Won Ton Strips (egg roll wrappers cut into strips, fried and lightly salted)

Mix all chopped ingredients together or put them all on the side for people to create their own salad. Add dressing and a small amount of Peanut sauce. Sprinkle with some fried won ton strips and serve immediately.


I hope you enjoy making and eating this salad as much as we do.

LinkWithin

Related Posts Plugin for WordPress, Blogger...